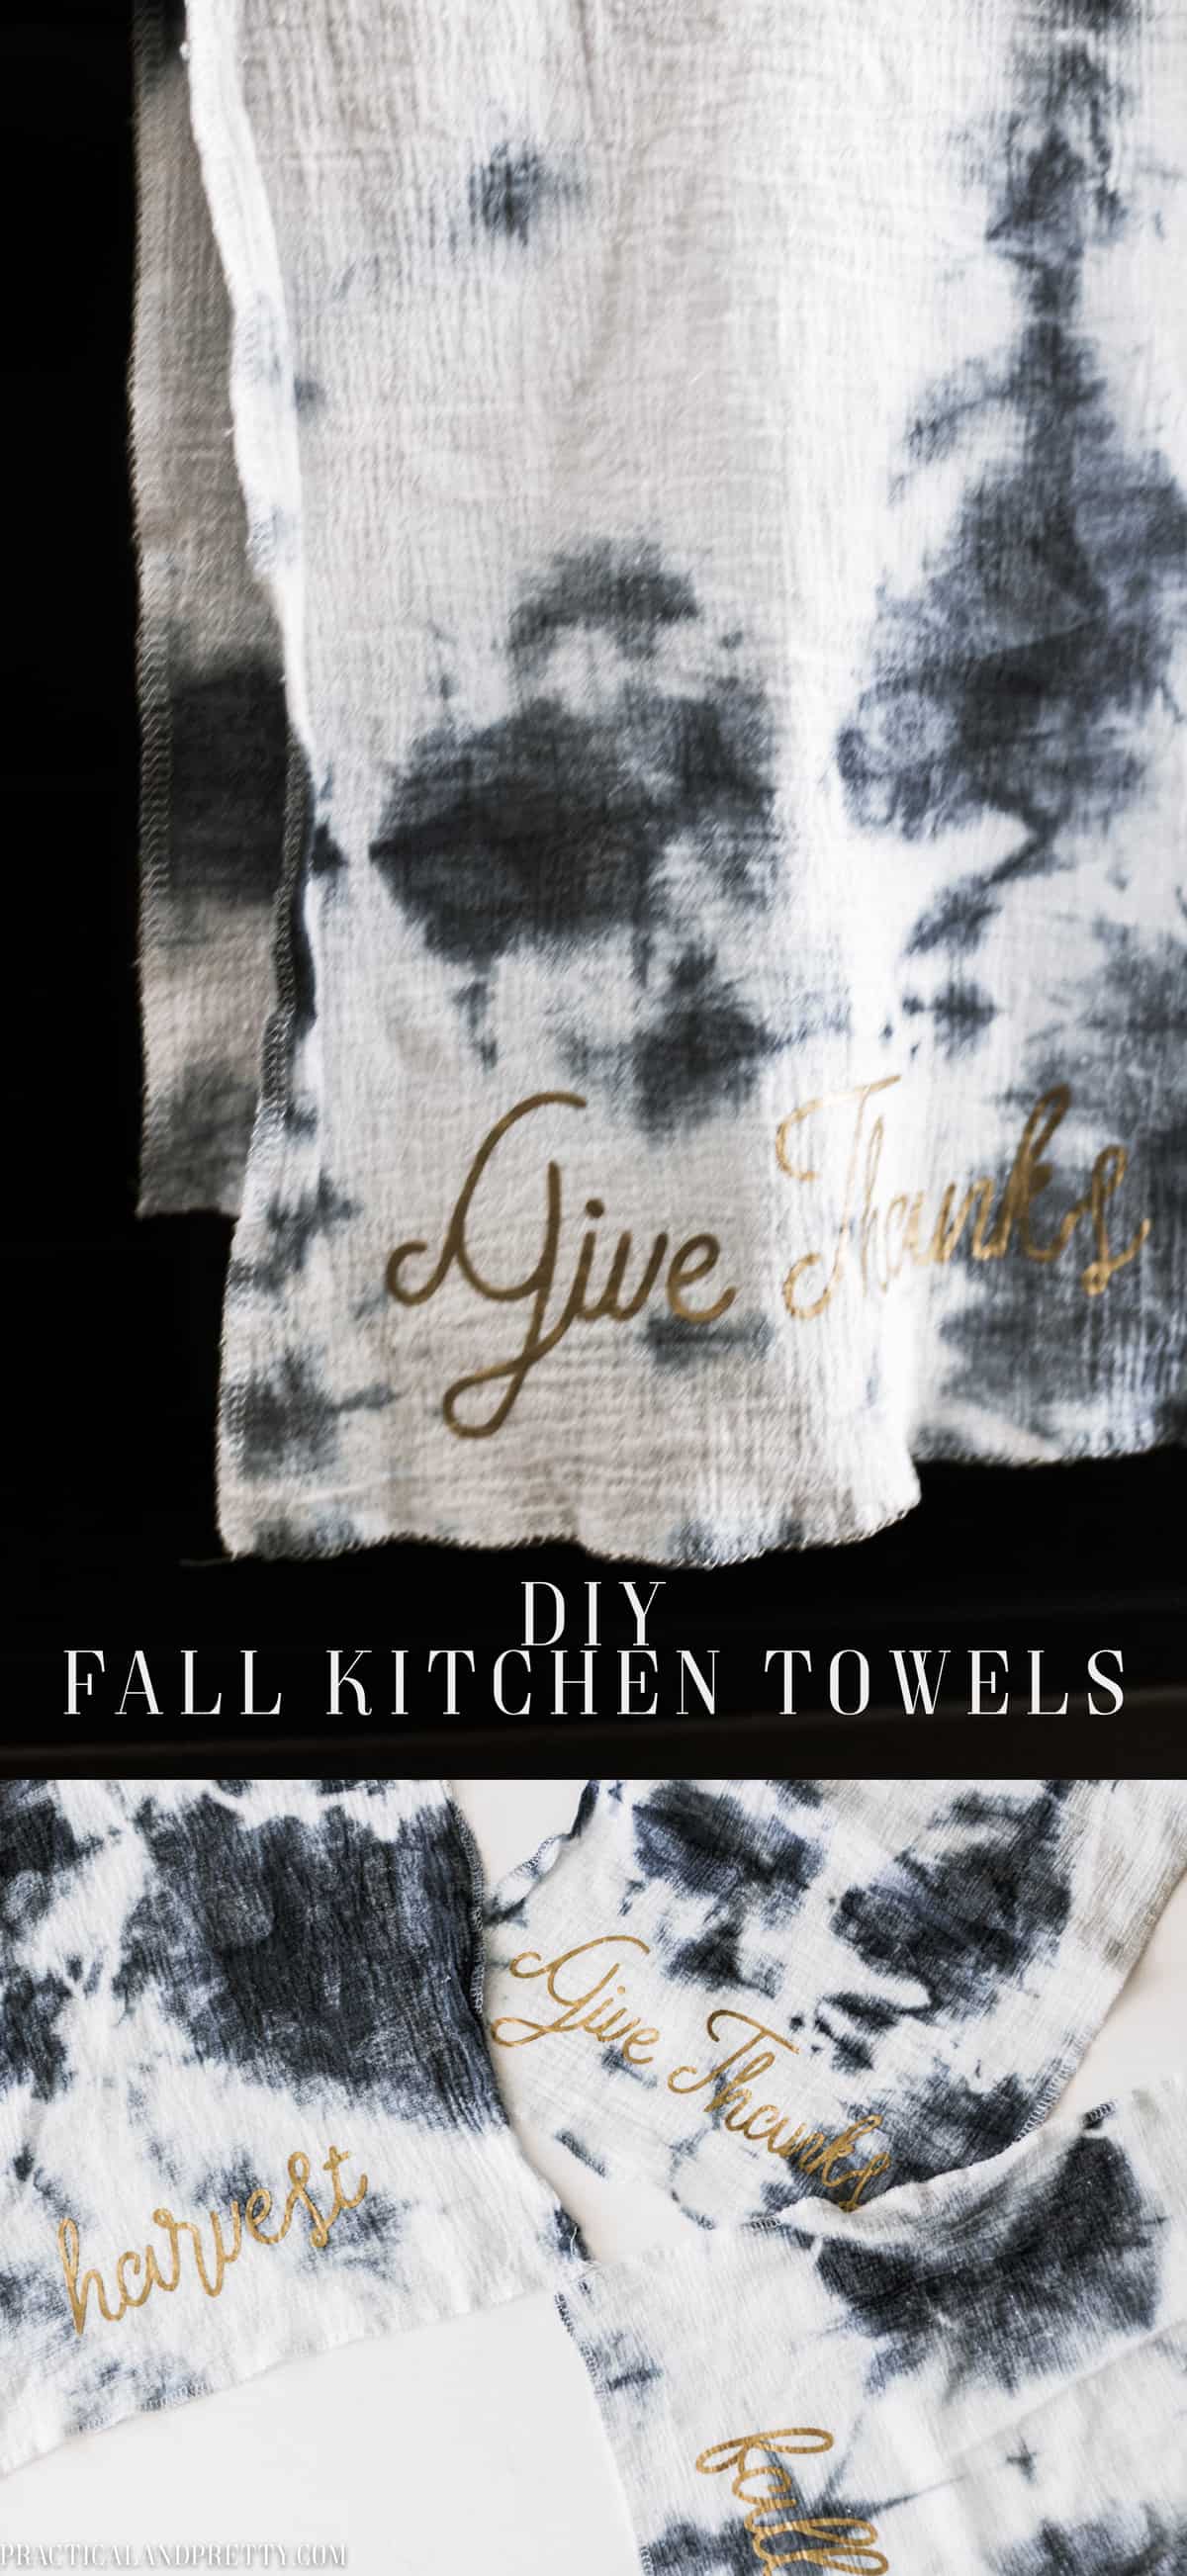
This fall kitchen towels DIY is a perfect way to get excited about this coming fall season! They will even look beautiful all year round.
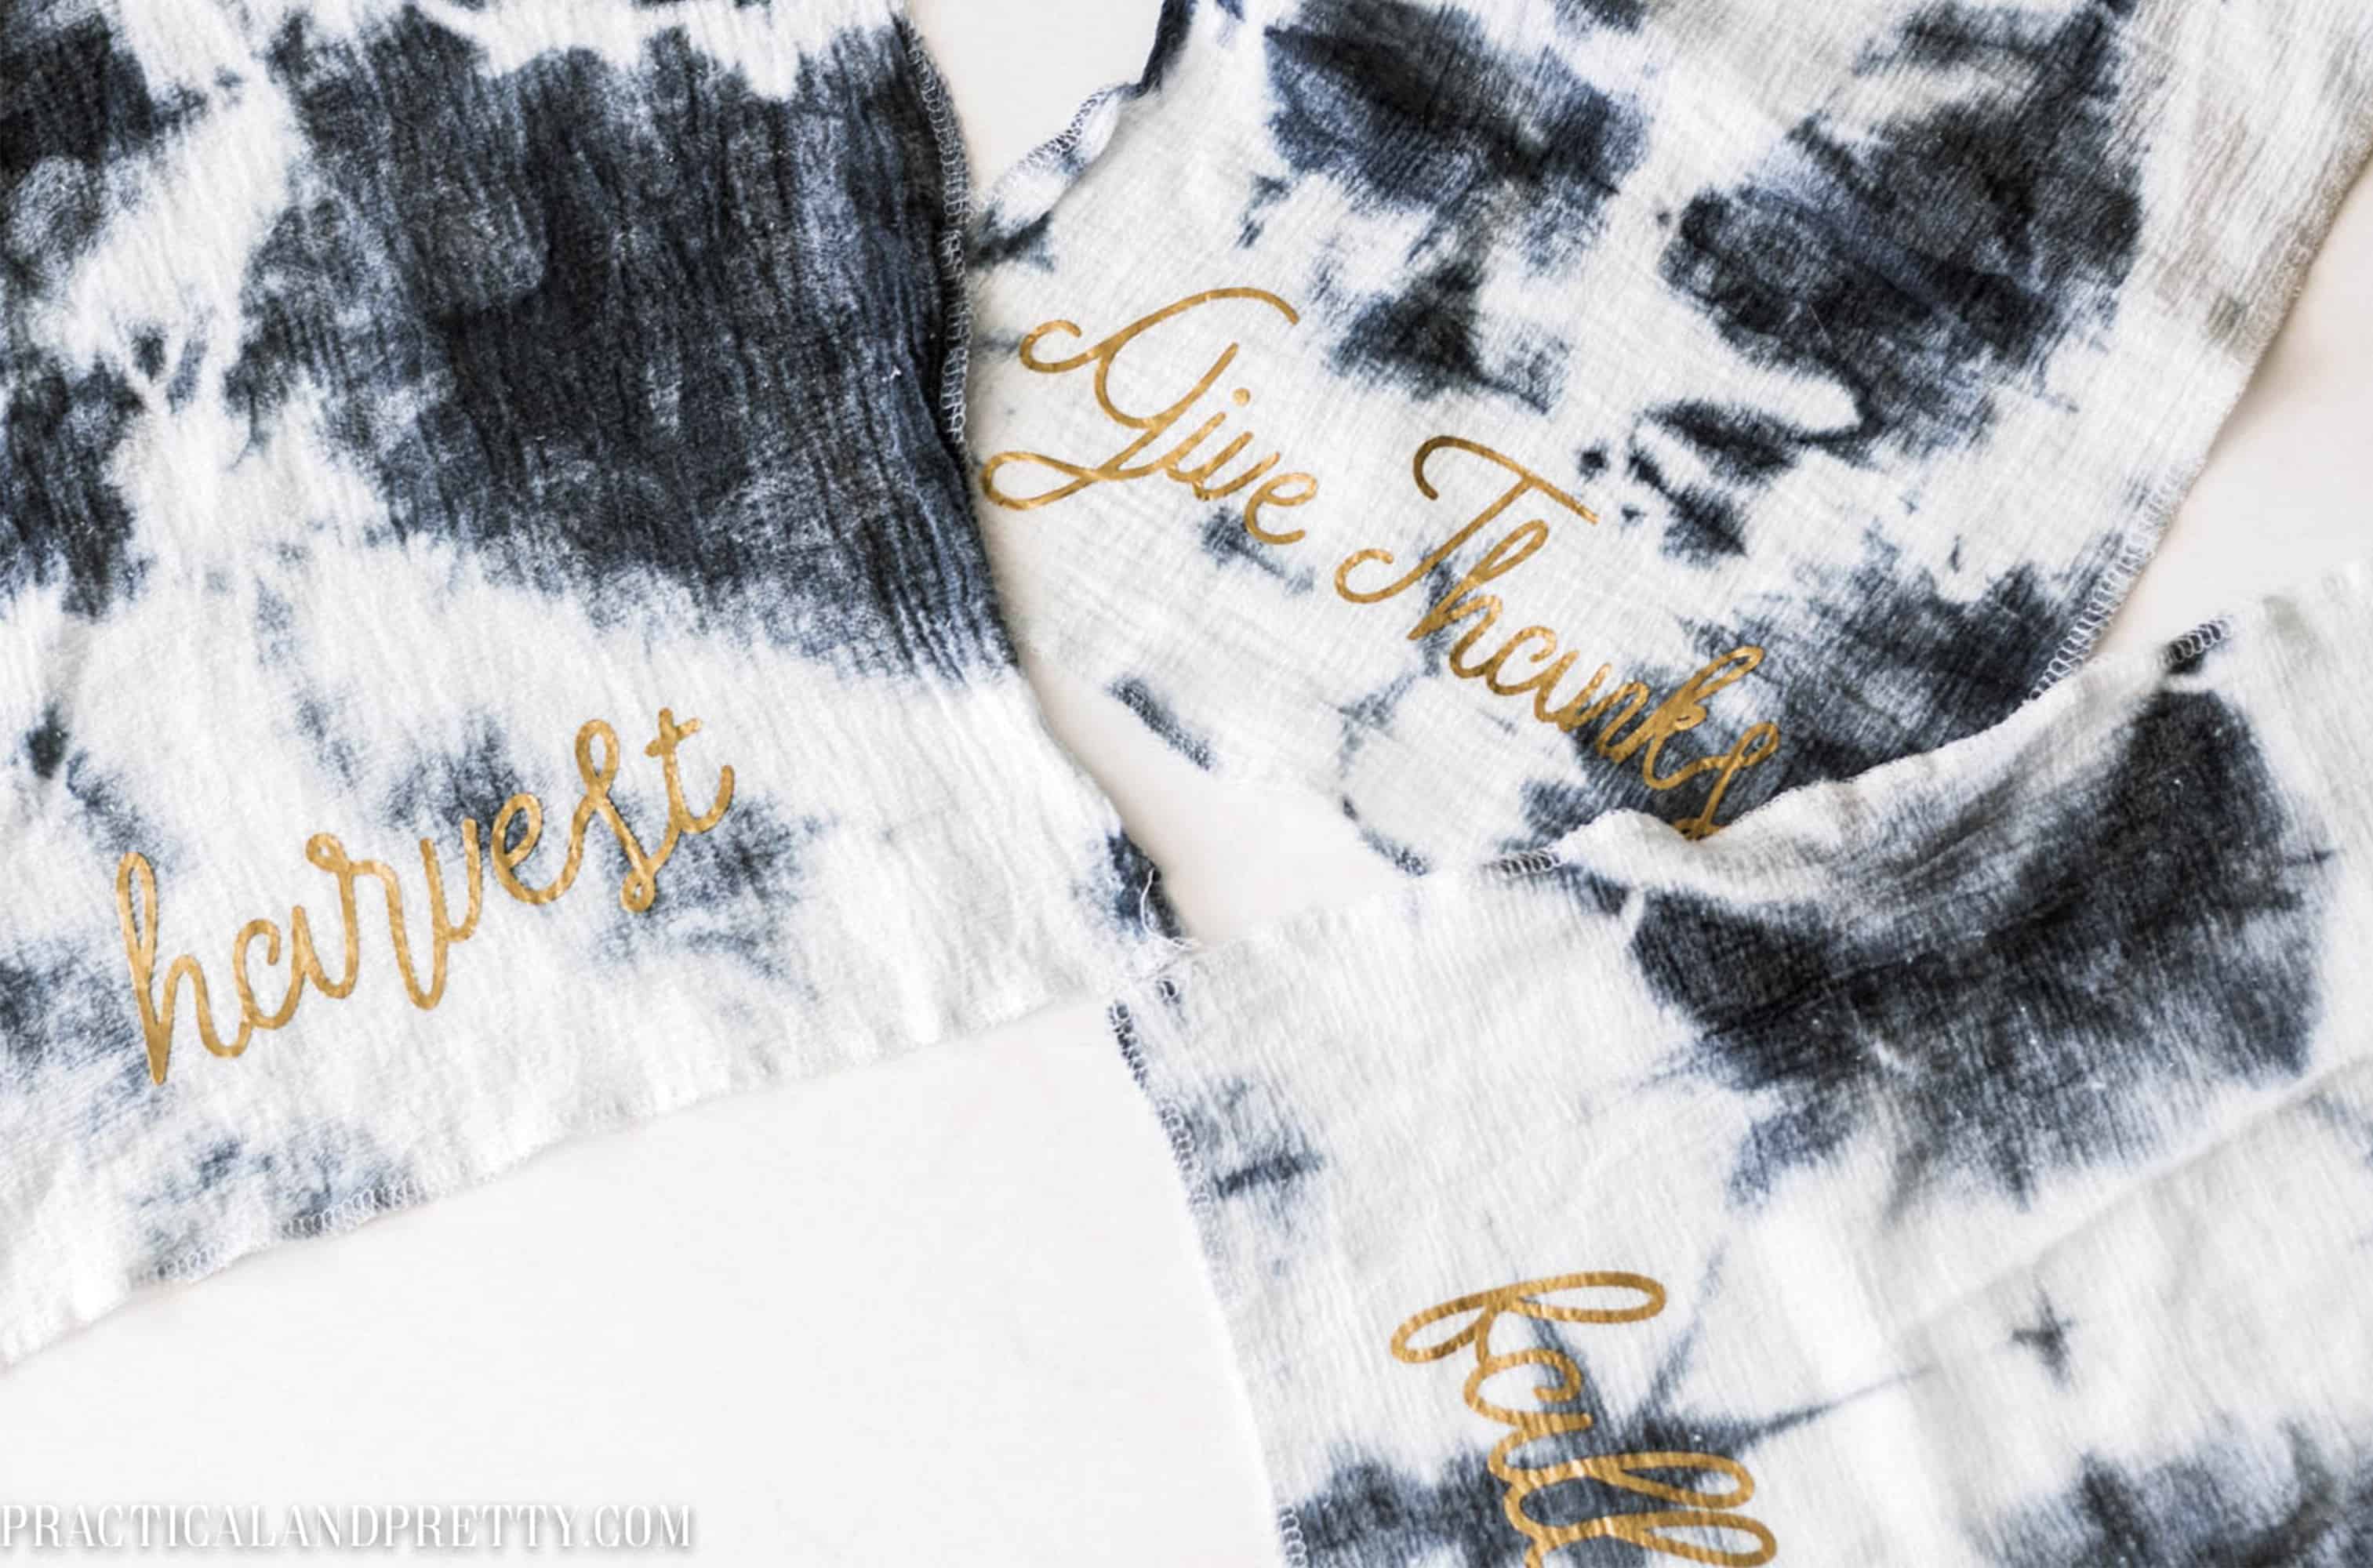
I’m always looking for different ways to incorporate shibori dye unique and different because they’re the perfect ‘blank’ canvas!
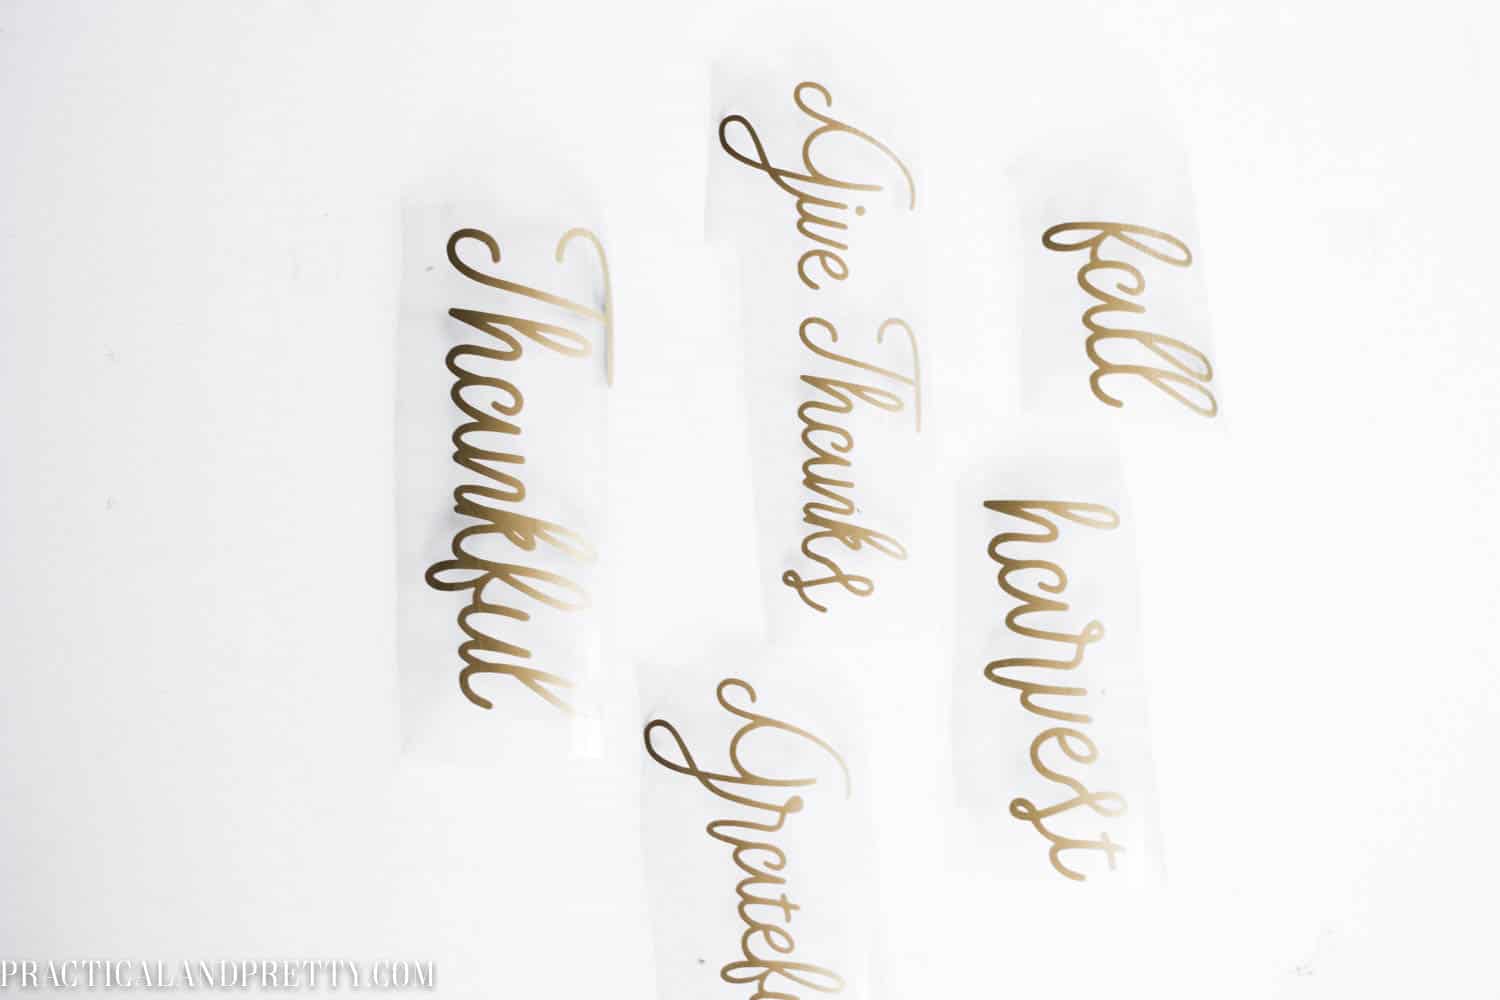
What You Need to Make Fall Kitchen Towels:
- Kitchen Towels
- Gold Iron On
- Cricut
- Standard Grip Mat
- Iron (or this insanely cool new Easy Press from Cricut!)
- Ironing Board
- Press cloth (a plain piece of cotton)
First, you will cut out your vinyl with your Cricut Explore Air 2 or Cricut Maker! Always remember to ‘Mirror for Iron On’ and also put your vinyl shiny side down. These are the two things I always seem to forget when I’m cutting and it can waste some perfectly good heat transfer vinyl really quick! Click on the thumbnail(s) below that you want to download and then you can save the PNG to your hard drive. Once downloaded, then you will be able to upload the PNG file directly to Cricut Design Space (or for your Silhouette too)!


 If you have never uploaded files into Cricut Design Space before, it’s really simple. Just click “Upload” on the left panel and follow the instructions. These files each have blank backgrounds, so you shouldn’t need to do anything except upload and choose them to be cut files!
Directions:
Heat transfer vinyl is very simple, but also easy to mess up. Make sure you don’t miss a step, or you’ll need to start over. If you mess up, use your iron to heat up bits of the vinyl and pull them off. That usually works ok!
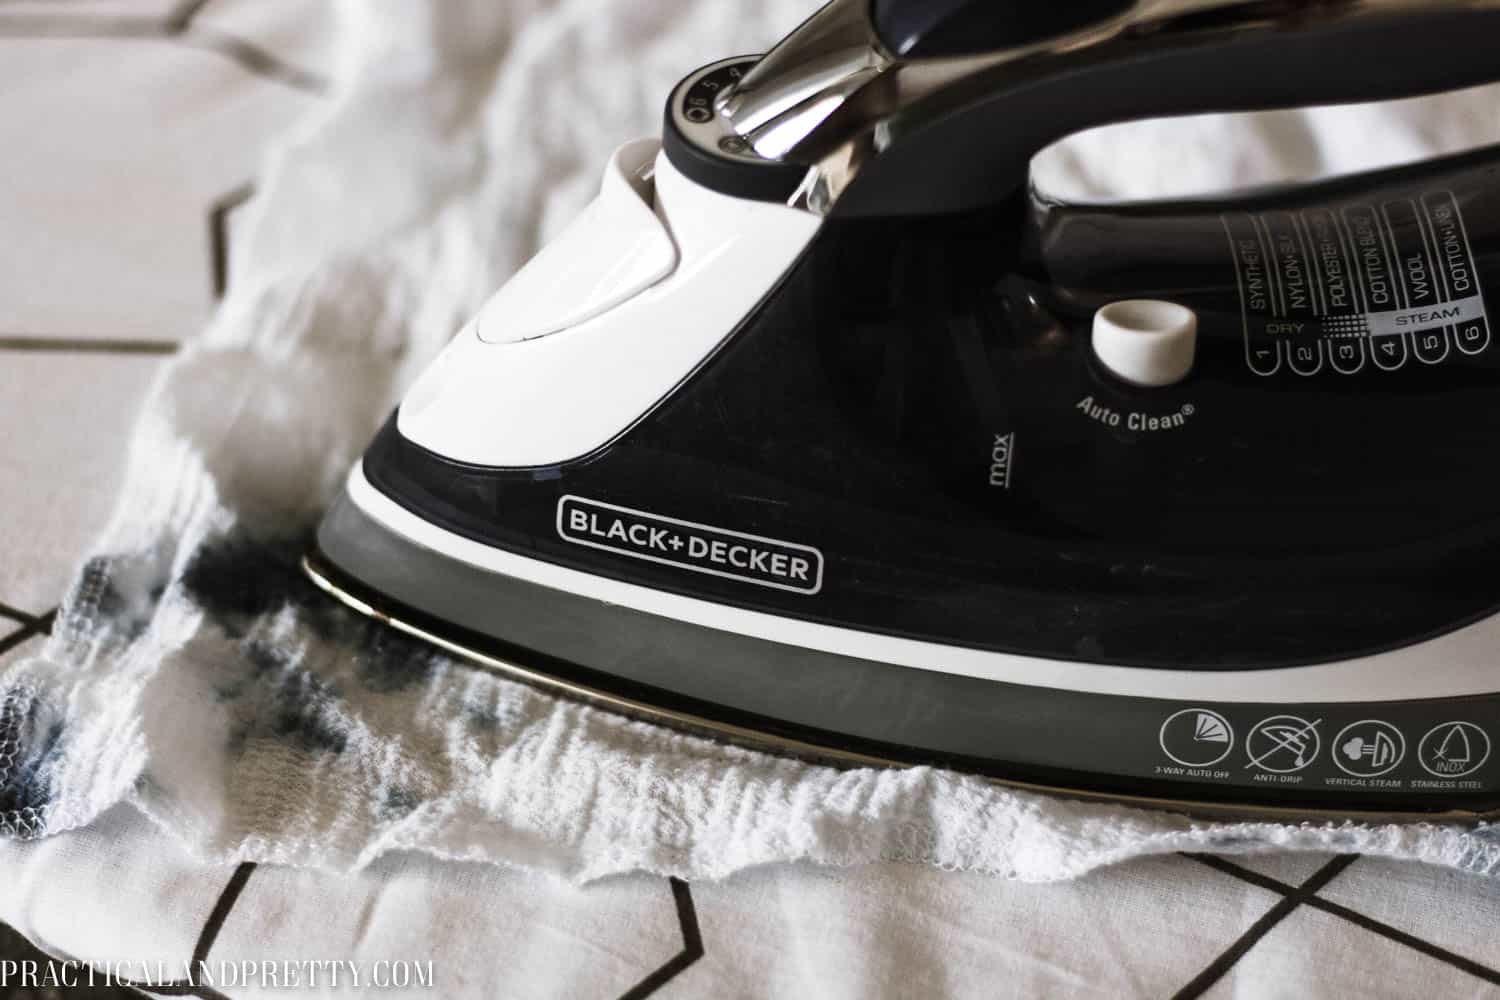
Heat up your fabric with your iron on the highest setting for about 15 seconds.
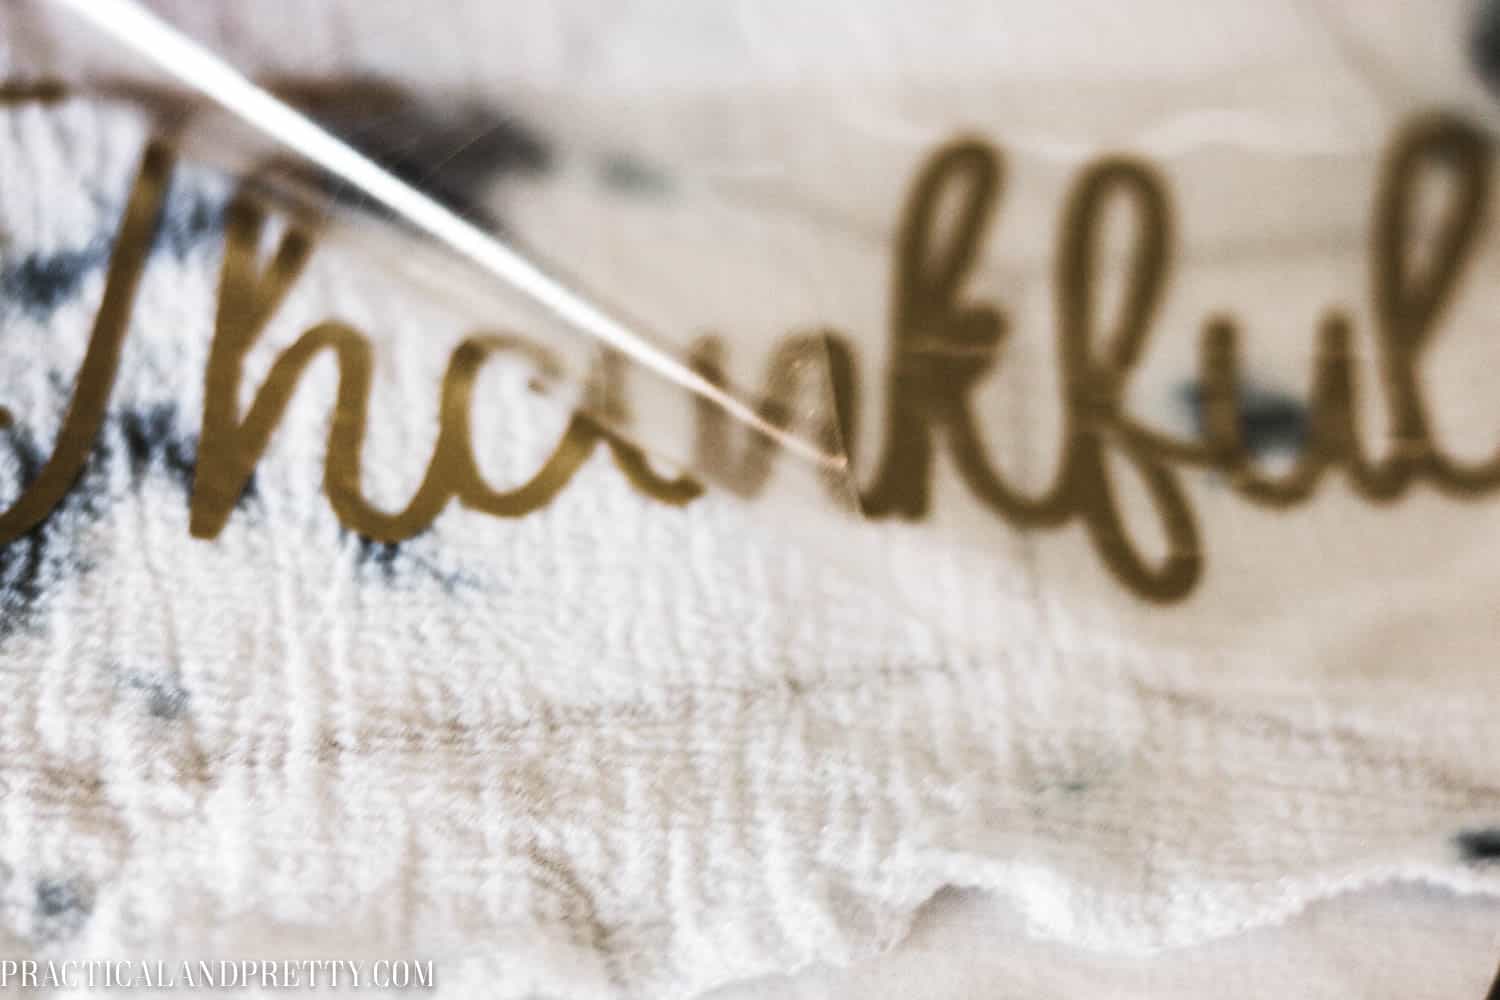
Next, you will place your cut vinyl on the fabric and place your press cloth on top. The clear film should be between the cut design and your press cloth.
Place your iron on top of the press cloth and hold for approx 30 seconds, while applying a little pressure.
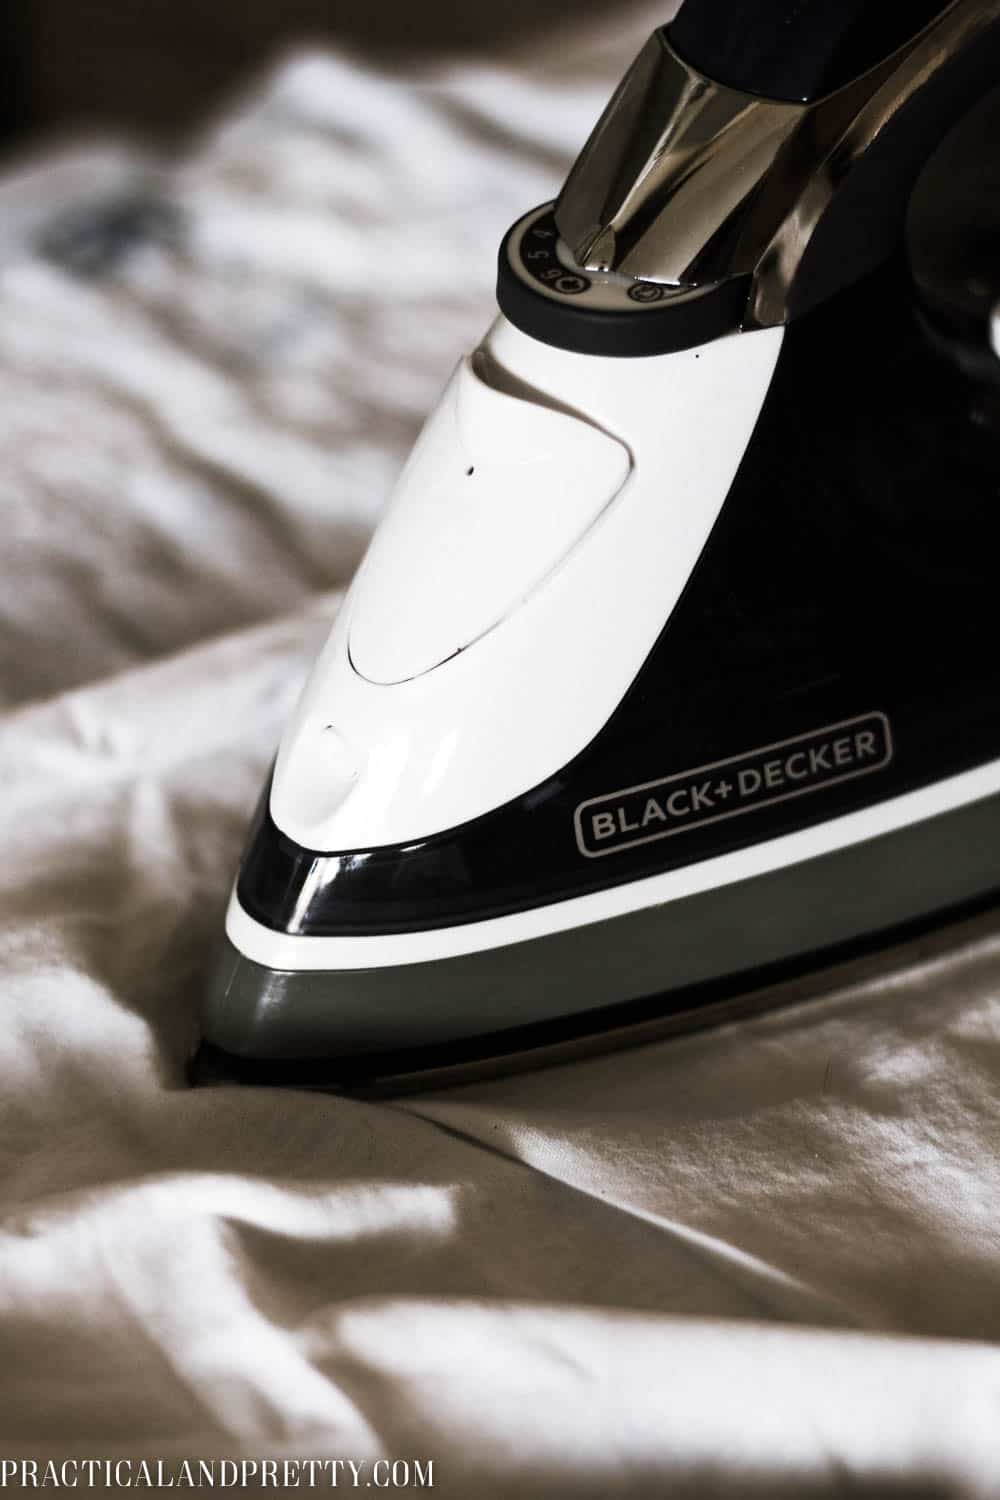
Allow to cool for approx 10-15 seconds and then remove the plastic. You still want the plastic somewhat hot when you remove from the plastic from the vinyl. If you start pulling and the letters are coming off or only partially stuck, lay the plastic back down and use the very tip of your iron to melt that part back onto the fabric.
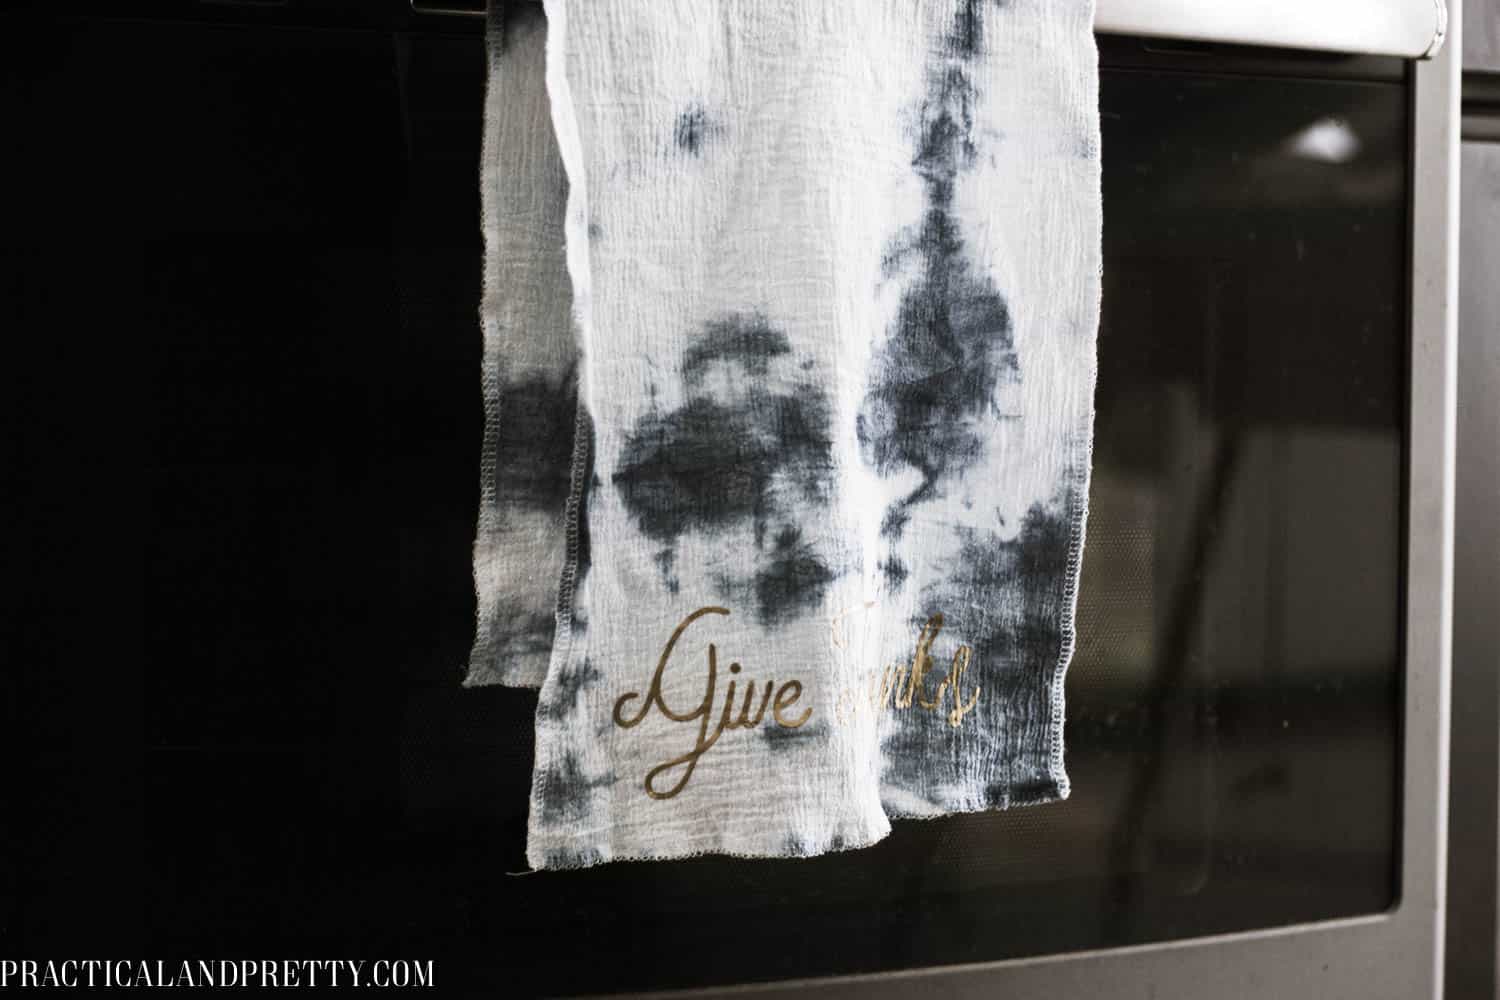
Once you have fully removed the plastic, place the press cloth back over your vinyl and heat it up for 5-10 seconds to make sure it’s on you towel really well. Then you’re finished!
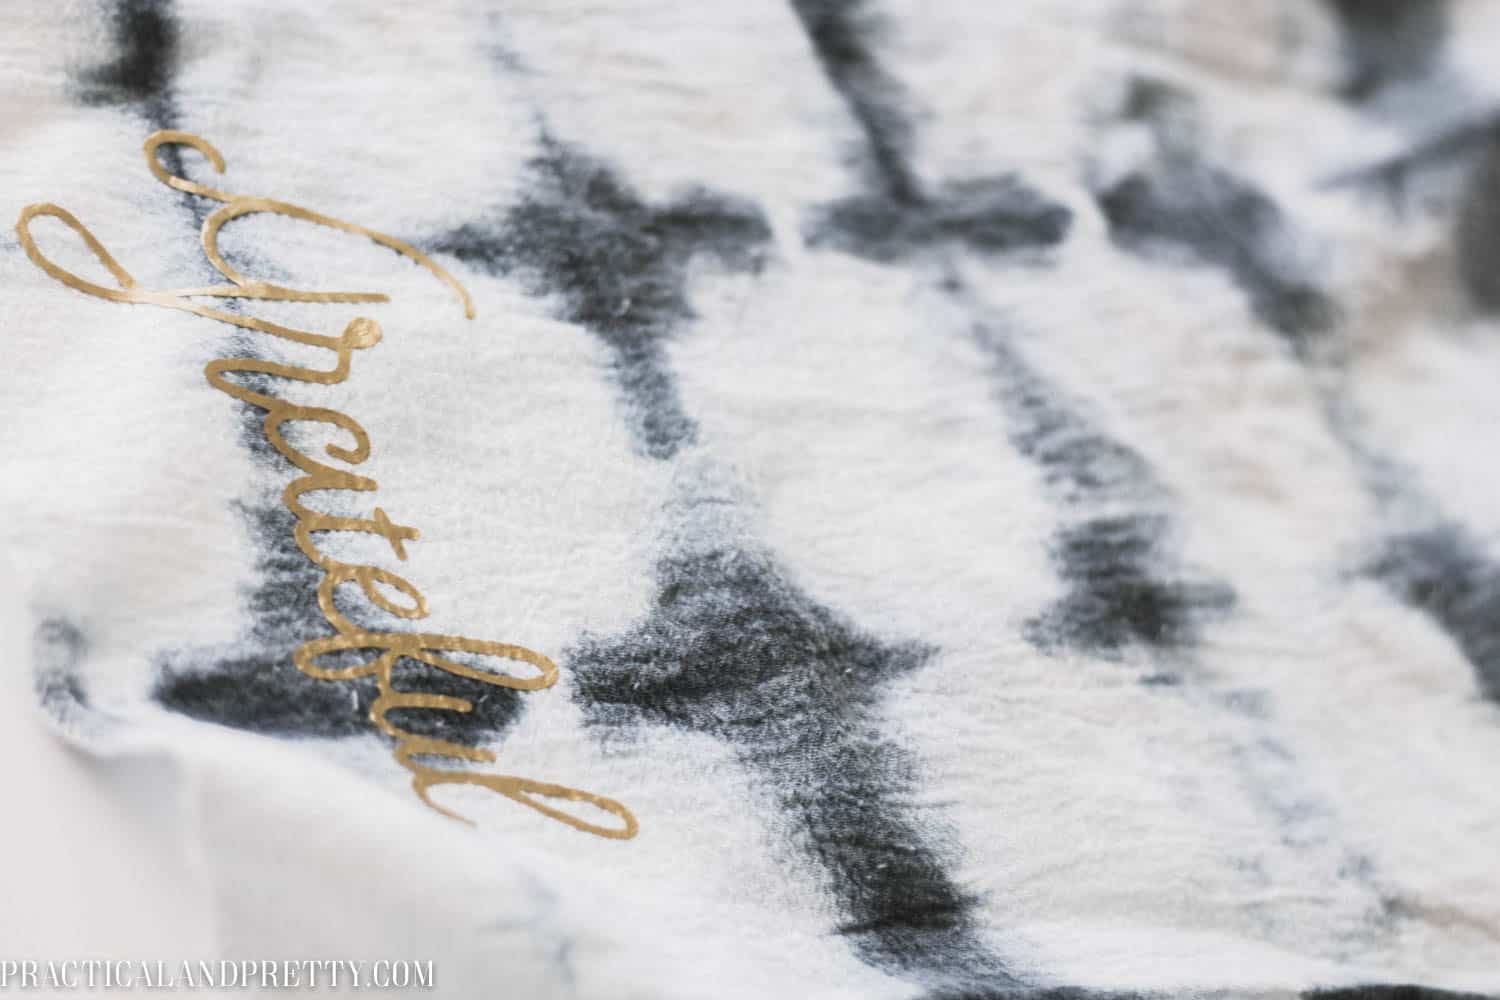
I love the way these add a little fall touch to my house without looking too much like traditional fall decor!
If you liked this post you may also like this post on how to make a custom T Shirt with your Cricut!
If you love this project, I’d love you forever if you wanted to pin the image below!!