A cute Chipboard Cake Topper made from Heavy Chipboard, a Cricut Maker and a Knife Blade. It’s so easy to create custom cake toppers using these products and today I’m showing you how!
This is a sponsored conversation written by me on behalf of Cricut. The opinions and text are all mine.

A few weeks ago it was my daughters birthday and with the release of the Knife Blade for my Cricut Maker I knew I wanted to make my own cake topper for her birthday cake!
First, quick shoutout to my belated birthday girl! I just can’t get enough of her! Also, if you’re wanting to make this cute Birthday Girl Shirt, check out this tutorial here!
DIY CAKE TOPPER
Okay, now back to the cake top tutorial!
Supplies:
- Cricut Heavy Chipboard
- Cricut Maker
- Cricut Knife Blade
- StrongGrip Mat
- Masking Tape
- Hot Glue Gun & Hot Glue
- Wooden Dowel
- Spray Paint (in preferred colors)
- Design Space File
Directions:
CALIBRATE YOUR CRICUT KNIFE BLADE
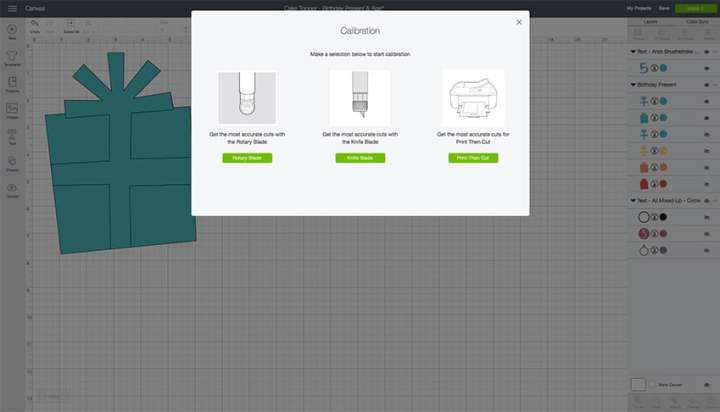
The very first thing you need to do is install your Knife Blade and make sure you machine is calibrated for the Knife Blade. It’s super easy, but for a detailed tutorial check out this post from Cori at Hey, Let’s Make Stuff! You only need to do this once for each Knife Blade!
HOW TO MAKE A CAKE TOPPER
After that is all done, then go ahead and open up the Design Space File HERE! At this time you’ll want to confirm the size of your cut files. You’ll want to make sure the cake topper is a little smaller than your cake size!
I also played around with color combos as this time and decide on this fun palette!
Once you’ve got everything sized and colors chosen, then you need to change all the layers to one color, so that all the design elements will cut on the same piece of Heavy Chipboard and not split them up on 3 different cutting mats.
Then hit ‘Make It’ in the top right hand corner.
Make sure everything is arranged on the mat properly and hit ‘Continue.’
At this time it gives you all sorts of reminders which are good!
Make sure the star wheels on the rolling bar are moved all the way to the right! If you don’t then the star wheels will leave grooves and marks on the chipboard, which will ruin the cake topper!
Next, put the Heavy Chipboard onto a StrongGrip Mat.
As with anything that is going to be cut with the Knife Blade, you want to secure it to the StrongGrip Mat with masking tape. This ensures that the material doesn’t shift at all on the StrongGrip Mat, ruining your cut.
You will then load your mat into your Cricut Maker and press the ‘C’ button on your machine!
Watch it semi-close towards the end of the cutting to make sure that the sides of any of the cuts aren’t lifting. If they are, feel free to put a piece of masking tape over those parts.
Next up – paint! With Heavy Chipboard you will want to spray paint the pieces. Brushing the paint on will apply it too thick and it can warp the chipboard. So, light sprayed coats work better!
Then hot glue any pieces together that need to be. And then hot glue a dowel on the back of the pieces.
And that’s it! Time to add the cake topper to the cake!
With this particular cake topper, you could have also hot glued the ‘5’ to the front of the present if you wanted it more narrow!
I think it turned out pretty dang cute and my daughter loved it!
Looking for some more fun Cricut projects?
If you love this project, I’d love it if you pinned the image below!
This is a sponsored conversation written by me on behalf of Cricut. The opinions and text are all mine.


Flossie
Enjoyed reading the content above, really explains everything in detai,,the guide
is extremely interesting and effective.
King regards,
Boswell Henneberg