These Disneyland Shirt Designs are the perfect way to take your Disneyland trip to the next level! Four of the five designs work for Disney lovers of all ages and one design is perfect for when it’s a Girls Trip!
This is a sponsored conversation written by me on behalf of Cricut. The opinions and text are all mine.
I am so excited to finally be sharing these fun Disneyland Shirt designs with you today! Me and some girlfriends ditched our families last month for a Disneyland Girls Trip! Naturally we needed matching shirts, hoodies and fanny packs for the entire trip!
As soon as we booked our flights, I got to work designing 5 different shirt designs! We decided to put a couple of them on hoodies, since we knew for about ½ the day would be a bit cooler!
I am going to share a full tutorial for one of the shirt designs, but link all 5 of the shirt designs below!
DIY DISNEY SHIRTS
Items Needed:
- Shirts/Hoodies
- Cricut Maker
- Standard Mat
- EasyPress 2 (I used my 12×10 EP2 here)
- EasyPress Mat
- Everyday Iron On
- SportFlex Iron On
- Basic Tool Set
- Cutting Ruler
- Brayer
- Oh Mickey You So Fine Design Space File
- #DisneyDiet Design Space File
- Eat. Disney. Sleep. Repeat Design Space File
- Disneyland – Lands Design Space File
- California Girls Trip Design Space File
Directions:
Open up the design you want. I have linked all 5 designs above!
Go ahead and resize the image to fit the shirt that you’ll be applying the design to. Once the design has been resized, hit ‘MAKE IT’ in the top right hand corner.
As always when cutting Iron On, go ahead and mirror your image.
Then go ahead and select your machine from the drop down menu and select your material. I used SportFlex and Everyday on these tshirts. But, I do think it could be super fun to incorporate Foil and even possibly Patterned Iron On into these designs.
Once you’re all set then load the mat into your machine and then hit the ‘C’ button on your machine to start the cut.
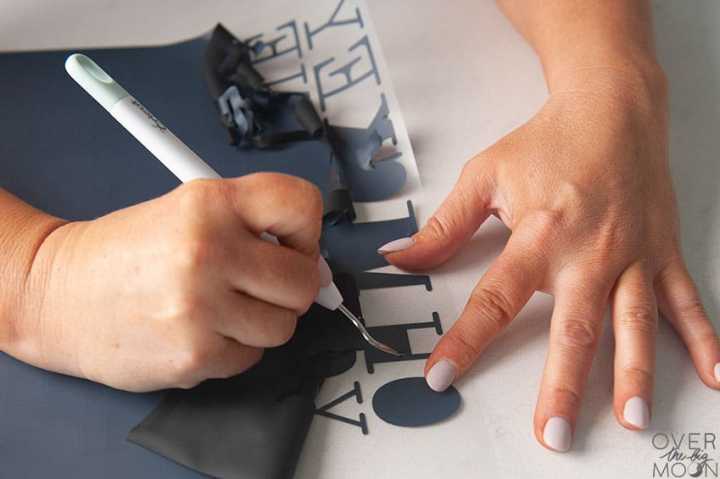
Once your design(s) are cut, then go ahead and weed out the excess Iron On!
I then like to use a ruler to make sure that I center the design in my shirt. I usually measure from the neckline and then also from the armpit area of the tshirt.
Once you’ve got the design in place, use your EasyPress 2 to apply heat. Look up you temperature and time recommendations here at Cricut’s EasyPress Heat Settings Guide.
Go ahead and remove the clear liner and you’re good to go!
BEST TOOL FOR APPLYING IRON ON
In my opinion, the EasyPress 2 is hands down the best tool for applying Iron On. The heat plate on the EasyPress 2 maintains an even heat surface, which allows for the Iron On to transfer to your shirt (or whatever surface you’re applying to) with ease! And you are able to set the heat temperature you want. Where with a home iron, you aren’t able to do that. So, you can easily ruin projects by overheating them.
Plus, Cricut offers an EasyPress Interactive Quick Reference Guide, which is a HUGE help! It takes all the guess work out of applying Iron On. No more wondering how long you need to apply heat.
If you’re new to Iron On or the EasyPress, I recommend referencing these educational posts that I’ve written:
- Everything You Need to Know About the EasyPress 2
- Cricut EasyPress 2 Questions ANSWERED
- Tips for Using Iron On Vinyl
All of those posts are chalked full of information that will have you a pro before you know it!
This Oh Mickey You So Fine is probably my favorite design out of all them! I literally where this shirt every week now!
You can find this design here —-> Oh Mickey You So Fine Design Space File
DISNEY T SHIRT IDEAS
Now that we’ve got the tutorial out of the way, let’s see all the shirt designs in action!!
The first day we were there it was raining for majority of the day! So, we were in a poncho! However, once the rain stopped, people were LOVING the #DisneyDiet hoodies! The above picture was our last picture of the day, right after we went on Splash Mountain!
I was SO beyond happy when I found all those cute food images right in Design Space.
You can find this design here —> #DisneyDiet Design Space File
DISNEYLAND SHIRT IDEAS
Since we had the food covered with the first Hoodie, I decided that for the next hoodie it would be fun to check off all the lands in Disneyland! We started the morning off in California Adventures, but then went back over to Disneyland to make sure we check off all the lands!
You can find this design here ——> Disneyland – Lands Design Space File
DIY DISNEY FAMILY SHIRTS
I really love this next design too! I think this would be a super fun design to make shirts for the whole family — kids included!
You can find this design here —-> Eat. Disney. Sleep. Repeat Design Space File
GIRLS DISNEY SHIRTS
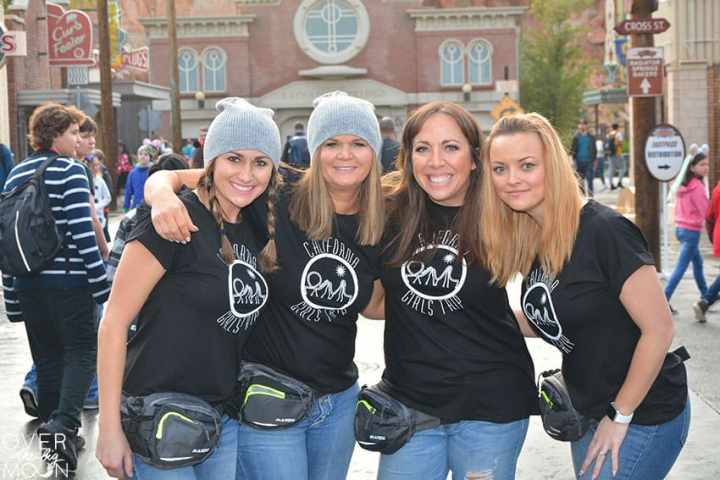
This last shirt isn’t necessarily Disneyland themed, but is obviously still appropriate! We honestly got the most complements on this shirt too!
And, because I know you’ll want to know — you can totally order these Fanny Packs off Amazon! I will NEVER Disney again without a Fanny Pack! It was the best! And this one even had a place for a water bottle!
You can find this design here —-> California Girls Trip Design Space File
Don’t forget to pin this image to save it for later!


Julie Blanner
These designs are adorable! Thanks for sharing!