These DIY Girls Rock Star Costumes are perfect Halloween costumes for any little girl! You’ll also find a Girls Just Wanna Have Fun theme and they’d also be a perfect Gem and Holograms costume!

Having a little girl is way too much fun! I start dreaming up a fun DIY Halloween Costume for her months before Halloween! Haha! This year I got the idea to put together a fun little Rock Star Costume for her, but my mind couldn’t decide between 3 fun looks. So, I just recruited a few of my daughter’s little friends and put together all three of these looks!
If you’ve followed me for a while, you know that I LOVE my Cricut Maker and that I use it multiple times a week! The Cricut Maker has SO many capabilities — it has an adaptive tool system that allows you to use multiple different cutting blades. This allows you to cut hundreds of different materials!
Today I am super excited to share the tutorials for creating these fun looks! All three looks were created by embellishing store-bought clothes with my Cricut Maker and different Cricut Iron On types and then adding some fun other flare! Then next week, I’ll be sharing how I created some of the fun Rock Star Accessories using my Cricut Maker to cut some leather and faux leather with the Knife Blade! So stay tuned!
GIRLS JUST WANNA HAVE FUN COSTUME

Items Needed to Make Girls Just Wanna Have Fun Dress:
- Black Mesh Tulle Dress
- Cricut Maker
- EasyPress 2 – mine is the 6″x7″ size, but any of the sizes would work
- EasyPress Mat – I generally like to use my 20″x16″ EasyPress Mat
- Standard Mat
- Essential Tool Kit or Weeder
- Fuchsia Holographic Sparkle Iron On
- Rose Gold Foil Iron On
- White Everyday Iron On
- Black Elastic
- Pink Tulle in several shades
- Cricut Ruler (optional)
- Cricut Brayer (optional)
- TruControl Knife (optional)
- Design Space File for the Girls Just Wanna Have Fun Design

GIRLS PUNK ROCKER OUTFIT TUTORIAL
Gather your supplies off the supplies list above and let’s get creating! I linked the dress I used above, but you can really use any fun simple black dress with some sort of tulle/mesh bottom! You’ll just want to be able to enhance it with some pink tulle!

Open up the Girls Just Wanna Have Fun Design Space file! Hit Customize!
The design is currently sized 6.5″ wide and just under 4″ tall. Measure the area where you want to place the design and decide if you need to resize it!
The letters are all currently “attached” with their like colors. I have set it up that way, so that once you send the cuts to the mat, they are all placed on the right mat and where they need to be! If you need to make any changes to the colors, fonts, or words then you’ll need to un-attach the layers first. Then re-attach them when you’re done!
Once resized and all changes are made, then hit ‘MAKE IT’ in the top right-hand corner!

Anytime when working with Iron On, you need to MIRROR the design prior to cutting! That means you need to click on all three of the mats and hit MIRROR!

Then hit CONTINUE!
Then it will have you connect your machine and set your material!
Because we’re working with THREE different types of Iron On, you’ll need to change the material between each mat cut! As you can see in the two screenshots below, I’ve changed what the cut material is!


The three types of Iron On that I used were: Everyday Iron On, Foil Iron On, and Holographic Sparkle Iron On!
Also, follow all instructions that appear on the cut screen – verify the image is mirrored and that you’re using the Fine-Point Blade!

Make sure to load the Iron On SHINY SIDE down onto a Standard Mat! I love to use TrueControl Knife to trim my Iron On to length before loading it on my mat. Also, if you’ve never used a Brayer to secure your material to your mat perfectly, then you’ve got to try it! I legit LOVE my Brayer!

After all three mats are cut, then go ahead and weed the unwanted Iron On from the designs.

Now it’s time to apply the Iron On onto our dress! That means it’s time to pull out your EasyPress, EasyPress 2, or Iron!
Start by reviewing the heat temperature and application directions for each of the 3 types of Iron On on the Cricut EasyPress Recommended Settings Page.
For this project this project, here are the settings it recommended:
- Foil Iron On: 295 degrees for 30 seconds
- Holographic Sparkle Iron On: 330 degrees for 30 seconds
- Everyday Iron On: 315 degrees for 30 seconds

You always start with the HIGHEST heat-temperate layer first! So, for this design, we started with the Holographic Sparkle Iron On.
Heat the area for a few seconds, prior to placing your design. Then you’re going to apply heat from the EasyPress 2 at 330 degrees for only 20 seconds, instead of 30 seconds. This is because you’ll be adding additional heat with each additional layer. If the clear transfer sheet won’t come off without the design lifting, then apply another 5-10 seconds of heat and try again.
The second layer will then be the Everyday Iron On. So, change the temperature on the EasyPress to 315 degrees. Make sure that ALL the Iron On is covered before applying heat over the design. I always like to use the clear plastic sheet from previous layers to help cover any previously applied Iron On. Again, apply about 10 seconds less time then the recommended time!
Repeat for the 3rd layer with the Foil Iron On at 295 degrees for the full 30 seconds! Then turn the garment over and apply heat onto the backside of the garment for 10-15 seconds!

And that’s it for the Iron On aspect! I’m really excited about this design and think that it just pops!

But, that alone isn’t enough to get my Dylan girl ready to rock out! I added some fine items to help embellish her costume!
Items to Embellish the Girls Just Wanna Have Fun Dress:
- White Tall Uniform Socks
- Black Tall Converse Sneakers
- 80’s Big Black Bow w/ Added Tulle
- Fingerless Gloves
- Silicone Jelly Bracelets
- Painted Fingernails
I made this super basic and easy tulle skirt to put underneath the black mesh! I just used some basic black elastic that I had on hand and wrapped pink tulle of all different shades on it! I have a tutorial coming next week for this!

I also added the pink Tulle onto her bow and I’ll share more details on that next week too!

All and all I am OBSESSED with her costume! She’s literally KILLING me with her rock moves and cute little rock face!

GEM AND THE HOLOGRAMS COSTUME

Items Needed to make the Gem and the Holograms Outfit:
- Black and White Color Block T-Shirt
- Pink Skirt <——- I’m loving the shimmer on this!
- Cricut Maker
- Standard Mat
- White Everyday Iron On
- White Glitter Iron On
- Gray Glitter Iron On
- EasyPress 2 – I used my 6″x7″ EasyPress 2
- EasyPress Mat
- Cricut Ruler (optional)
- Cricut Brayer (optional)
- TruControl Knife (optional)
- Essential Tool Kit or Weeder
- Black Fishnet Tights
- Black Chuck Taylor High Tops
- Color Block Star Design Space File
- Stars for High Tops Design Space File

I’m not going to go through the full tutorial again, but just give you details on what I actually used to embellish this look! You’ll use the same technique as I explained above in Dylan’s costume though!
To create the Star Color Block Shirt, open up this Color Block Star Design Space File!
Follow the tutorial above to cut the design out of White Everyday Iron On and a Gray Glitter Iron On!

Apply the Iron On one side at a time! You’ll apply the White Everyday Iron On at 315 degrees for 30 seconds and the Gray Glitter Iron On at 330 degrees for 30 seconds! Make sure and turn the shirt over and apply some heat on the back! And that’s it for the shirt!
I decided not to embellish the skirt, because I just loved the shimmer of the skirt and didn’t feel it needed anything! However, if you have a skirt that is a little plainer, feel free to add some fun designs to it!
Next up, let’s add some stars to the Black High Tops!
HOW TO APPLY IRON ON TO SNEAKERS:

I didn’t want to make the high tops busy, but I felt like they need a little something!
Open the Stars for High Tops Design Space File here!
I used White Everyday Iron On and White Glitter Iron On!
Roll a dish towel up and put it inside the high top to create a solid surface to press on!

Don’t forget to apply the Iron On type that requires the HIGHEST heat first! And don’t forget to cover all Iron On, before applying heat!


This outfit really was so easy and simple to make, yet makes a huge statement and has a ton of personality! Which is a PERFECT fit for this little girl and her spunk!

30 MINUTE ROCK STAR COSTUME
Item’s Need to create a Girls Punk Rock Costume:
- Black Jumpsuit
- Leather Jacket
- Cricut Maker
- Standard Mat
- Glam Squad Glitter Iron On Sampler
- Gray Everyday Iron On
- EasyPress 2 – I used my 6″x7″ EasyPress 2
- EasyPress Mat
- Cricut Ruler (optional)
- Cricut Brayer (optional)
- TruControl Knife (optional)
- Rose Gold Sparkle Shoes
- Triangles Design Space File
- Guitar Design Space File

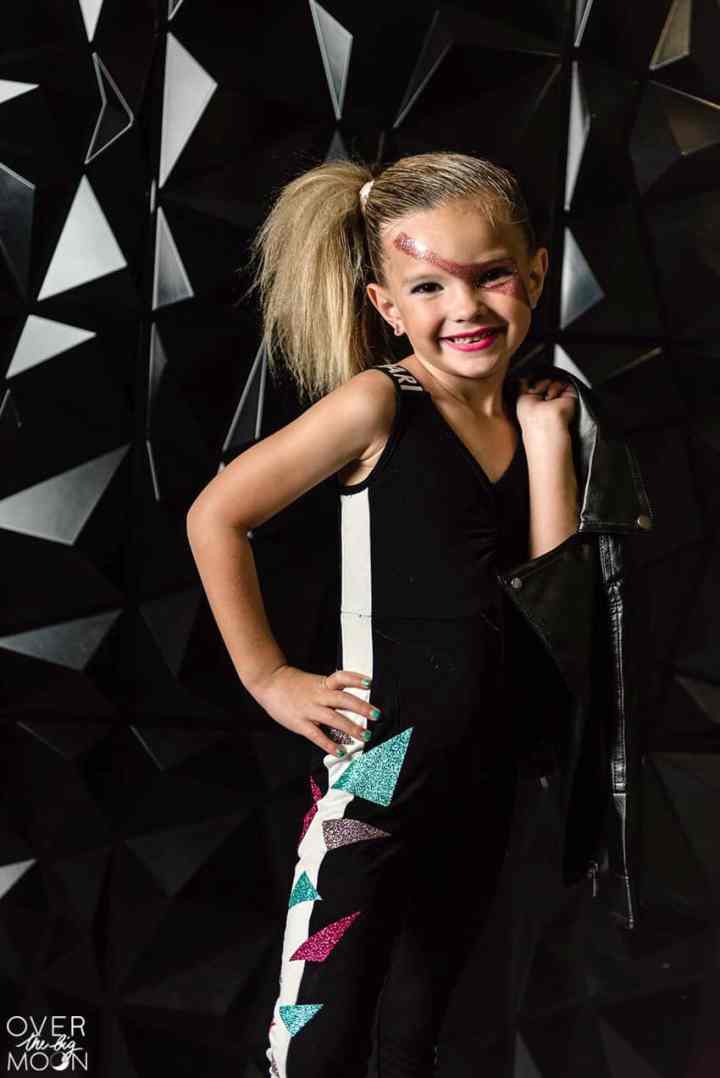
I legit DIED when I saw this fun little jumpsuit! I knew I could make it SO fun! And I knew I’d get to incorporate a fun leather jacket!
To add some rock flare to this jumpsuit for Dylan’s friend, Remi, we decided to add some fun 80’s triangles to just one of the legs! There’s nothing like some little 80’s triangles to make you want to rock out! And the colors of the Glam Squad Glitter Iron On Sampler literally had me jumping for joy!

I do want to add a disclosure here about my Iron On choice. This jumpsuit did have some stretch to it, so if I was looking for this design to have a long life, I would have chosen to use SportFlex Iron On. SportFlex Iron On stretches WITH the fabric! But, because this jumpsuit was super affordable and just being used as a Halloween costume I decided to go with the Glitter Iron On! I don’t think it’s going to last through too many wears and washes!
To create this jumpsuit open up the Triangles Design Space File and follow the same tutorial that I shared above! When applying the triangles, I just stuffed the leg of jumpsuit with towels!
Make sure and reference the EasyPress Interactive Quick Reference Guide to find out what the temperature and time settings are for your application!
DIY LEATHER ROCK JACKET

This little rock band would not have been complete without one of the girls having a leather jacket, right?

To make this jacket, open the Guitars Leather Jacket Design Space File! I’ve got two designs available for you to choose from. The jacket I bought had some back seams, so I went with the individual guitars. However, if you have a jacket with a solid back, I think the design with the star would be super fun!
Also, make sure to check your garment type! I ordered this jacket from Amazon and although it looks like leather/faux leather, it’s actually 100% cotton!
If you are nervous about applying Iron On onto your jacket, then just do a quick test on the inside of the jacket somewhere!

Once you know it’s going to work, then go for the application on the back!

Didn’t this little costume turn out so fun?

Also, next week I’m going to share the tutorial for this fun leather triangle hair band next week, so stay tuned!

Looking for some other fun girl costume ideas? Check these out!
- DIY Princess Leia Costume from Fleece Fun
- DIY Minnie Mouse Costume from Girl Loves Glam
- Store Bought Ideas from Sengerson
- No Sew Capital Marvel Costume from Tried and True
- Shopkins Costume by Made by a Princess Parties
- BeeWitch Costume from The Celebration Shoppe
- Skeleton Costume from Creatively Beth
- DIY Octopus Costume from Giggles Galore
- DIY Owl from Sunshine and Munchkins
- DIY Greek Goddess Costume from Make It and Love It
If you love these costumes, I’d LOVE it if you chose one of the three images below to pin!! THANKS friends!


J
Love these!!!! I’m wondering what kind of face paint did u use? I need something that won’t smudge and get in my daughters eyes. Tia!
Billy
My daughter would go nuts for this this Halloween! Reminds me of a 2018 Punky Brewster, LOVE IT!
Liz
These are so fun! Every little detail works perfectly! I love the boots!
Pam Dana
Thanks so much!
Julie
So easy, so adorable!
Pam Dana
Thanks! Easy is what I was going for!! hehe!
Michael
Oh snap! These are so much fun! What a great idea for a DIY costume. So well done!
xo Michael
Pam Dana
Thanks so much Michael! Appreciate it!
Jamielyn
These costumes are SO SO cute! My girls would LOVE them!
Pam Dana
Thanks friend! Appreciate it!