Customize your coffee tumbler or water bottle with these DIY Vinyl Tumbler Designs for Moms! These fun tumbler vinyl designs are perfect for all moms and add some fun personality to morning coffee or gym water bottle!

Happy Friday friends! I got in a crafting mood last week and decided to customize some of my tumblers! Every girl needs a good Mom tumbler, right? I may or may not have an obsession with tumblers and have a much larger collection then any one person needs! But, they’re just so cute!
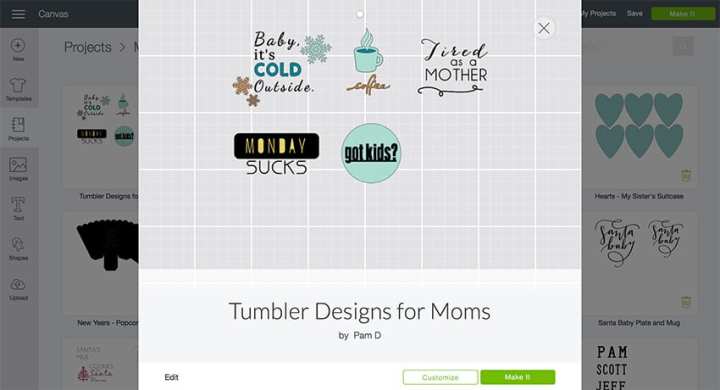
I ended up making 10 different tumbler designs, which I’m sharing all with you. But, here’s a sneak peak of what I made.
They’re super easy to make – even for beginners!
VINYL FOR TUMBLERS:
I’ve got 10 different designs all ready for you in Cricut Design Space that are perfect for moms! I’ve got 5 designs in each link.
The first five are:
Baby it’s Cold Outside – Coffee – Tired as a Mother – Monday Sucks – Got Kids?
You can access them ——-> HERE!
As you can tell, I like simple, modern designs! Nothing to complicated!
The second batch of designs are all one color, but you could easily customize them to bring to color variation to them.
The second five are:
Girl Boss – Hey girl Hey – Wife.Mom.Boss – Mom Fuel – Sweat
You can access them ——-> HERE!
Once you click into the Cricut Design Space file here’s what you need to make them:
Supplies:
- Cricut Maker or Cricut Explore Air 2
- Cricut Vinyl in your color choice(s)
- Standard 12x 12 Mat
- Essential Tool Kit
- Transfer Tape
- Tumbler of your choice (however, I love this one, this one for hot drinks and this one for water on Amazon)
Instructions:
Click into the design space file of your design choice. Again, they can be found here and here!
Go ahead and hide any of the designs you aren’t interested in. Everything is currently grouped together, so you’ll just need to hide the Group and it will hide all the elements in that particular design.
If you want to make any changes to the design, you’ll need to ungroup the design. You can then change font, colors, words, etc. Once the edits are made, go ahead and a re-group the design elements together.
Next, measure the area on your tumbler to figure out what size you’ll need your vinyl design. Resize the design to what you need it to be.
Then go ahead and hit “Make It” in the top right hand corner.
It will then place all the designs on the appropriate colored mat. Scroll through the mats and make sure everything is where it’s supposed to be.
If vinyl cuts from the same design on the same color aren’t showing arranged like they’re supposed to, then just go back to the design file, un group, select the layers you want to stay in place, and attach those layers together. After you’ll need to select all the design elements and re group them together.
After you’ve reviewed the mats, then hit Continue.
Apply the vinyl to the standard mat in the color order that the screen tells you to. Select your machine, set your material to vinyl, make sure the fine-point blade is loaded and then load your mat in your machine.
Once flashing, push the Go button.
Once all the vinyl is cut, then go ahead and cut them apart, weed all the designs and apply transfer tape to the designs.
Apply them according the design pictures! Because these designs were smaller, I didn’t feel a need to measure out their placement. But, feel free to if you want.
I have been having a blast using my tumblers the last week! I love them all so much! haha!
Which design are you most excited to make?
If you love this project, check out these other vinyl projects:
DIY Chore Chart | Hello Summer Sign | North Pole Porch Sign
If you love this tutorial, I’d love you to pin the image below!
This is a sponsored conversation written by me on behalf of Cricut. The opinions and text are all mine.


Rebecca
Hi are these downloads no longer available? When I click “here” it opens my cricut app then closes right away.