A super easy Easy DIY Headboard hung using command strips! The perfect solution for renters or kids rooms where you don’t want to attach it directly to the wall.

Hey friends! Today I am SUPER excited to share with you this fun project! We’ve been in our house a year now and I hadn’t really done anything to our guest room! Partially out of laziness and partially because I knew we were going to finish our basement and move the guest room down there. I wasn’t sure what I was going to do with the space afterwards.
Then a few weeks ago I decided I wanted to do something with that room and didn’t want to wait until the basement as finished! First up, a headboard. I pitched the idea to my husband and he wasn’t super stoked, because we are arm deep in finishing the basement. Every extra penny that we have right now is going into the basement cost. But, I just couldn’t shake the idea of wanting to make some progress in that room. Then I had this idea pop into my head! Pretty Providence shared this post earlier this year of hanging a gallery wall with command strips! Genius, right? So, why couldn’t I do that with a headboard?
Well guys, I did it and it worked! Perfectly I might add!
DIY HEADBOARD
Supplies Needed:
- 5 – 1×6 Boards (or as many as you need to create the height you want)
- Hand Sander or Sandpaper (for light standing)
- Stain or Paint of Choice
- 20 Sets of Command Picture and Frame Hanging Strips (holds 16lbs)
- Long Level
Directions:
Start by taking all your 1×6 boards and give them all a light sand. You really only need to worry about the front side and the edges.
Next wipe off the boards with a super damp cloth to make sure that the surface doesn’t have any dust or debris on it.

Then go ahead and stain or paint your boards.
I stained mine using MinWax Dark Walnut and then used a Polycrylic to create a protective coat and finish. I wanted a different texture and tones in my boards, so you’ll notice that in the above picture.
After I finished the boards, I took them inside and laid them out in different order to figure out what order I wanted them in!
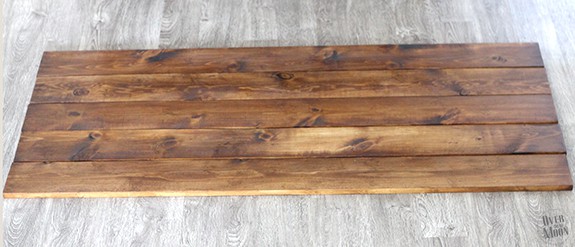
Figure out where you want the bottom of the bottom board and measure and mark that spot.

Next, add the Command Picture and Frame Hanging Strips to the back of the boards. I attached the pair of strips to each other, so like put the front on the back. Then I peeled one side of the command strip and attached it to the board. The command strips can hold up to 16lbs each and the boards weight about 5lbs. Honestly, I think that 3 command hanging strips would be totally sufficient to hold the board up. But, I wanted to make sure it was being held level, so I added 4 of the command hanging strips to the back of each side.
I also numbered the boards as I put them up, so I wouldn’t have to guess the order if I ever moved the bed!

The first board is the trickiest to get hung. We held it up to the wall, made sure it was level. Then just leaned the board back, keeping the bottom of the board still level and touching the wall. Then we removed the backing of the command strips and then attached it to the wall. Make sure and push the board firmly, to make sure that the command strip is totally attached to the wall!

I didn’t want the boards touching, but I didn’t want a big gap between them either. My husband had the suggestion of getting some nickels to use and it worked perfectly! We placed 6 nickels along the board and then prepped the next board (put on command strips, number it and then remove the command strip back). Then we just slowly placed it above the board, allowing the nickels to create the gap I was looking for.


I am so happy with how it turned out! And the best part is that I can move it to a different wall or room at any point that I want too! Woohoo!


Hope you guys have a great experience putting together your own DIY Headboard using Command Strips!
Be sure and check out these other fun DIY’s!

DIY Bench | DIY Produce Stand | How to Build a Huge Chalkboard
If you love this DIY – I’d love for you to pin the image below!

Pam L .
How do you get to the Command strips to pull on them to remove them from the wall?
Pam Dana
I used the velcro ones. So, when it was time to remove them, I pulled the wood slat away from the wall, which exposed just one side of the velcro command strip. Then there is a pull tab at the bottom that you will pull on slowly until releases from the wall!
Danielle
Is this a queen bed?
Pam Dana
Yes, it is.
Rachel S
Did you experience any difficulties with the boards warping and not staying straight on the wall?
amy p
how has it held up over time?
Mon
Just curious if the boards have stayed up? Would love to do something like this in my room in my rental apt, but I feel like certain activities could cause them to come down? Thoughts?
Marian Mitchell
This is my question too!
Cindy
Pam, when you move the headboard are the command strips stuck to the wall? How do you get them off with out removing paint/Sheetrock??
Andrew
Love this! I’m curious, what size bed is this that you did this for?
Shadae
I wish I had seen this blog post before I attempted to make my headboard. I cannot get the boards to stay up for the life of me. It’s such a nightmare, even after rev leaning the wall surface and applying brand new strips.
Shadae
Recleaning **
RS
i think your hubby wasn’t super stoked because he knew he would be doing some of the work!! ha ha!! 🙂 i’m living in a cute little apartment but it is very old and needs some TLC and i wanted to do something non-permanent, like making a headboard (my bedroom is a basement that was converted into an office with office ceiling tiles and very little else so it’s a little odd as a bedroom). i’m planning on doing all this, but maybe with fabric front! thanks for the idea!!!
Karen
Ah! We just signed a lease to a new apartment that isn’t as easygoing as our current place about putting things up on the wall. So, I’ve spent most of the day looking up for no-nails solutions for still decorating and making our future place as lived in as our current place. I saw the post you mentioned too and definitely gives me a more optimistic outlook! As for a headboard, I hadn’t even considered that, but now I want to do it too! Great idea 🙂 How many command velcro strips did you use per board? I might have missed that, but just in case, had to ask!
Katelyn
Where did you get the comforter? I love this whole idea!
Katelyn
Where did you get the comforter? I love this whole idea!
Pam from Over the Big Moon
The comforter is from Ikea – it’s a down with a cover! Thanks so much Katelyn!!
Katelyn
Thanks! Just bought a house and want to try to somewhat replicate this because I love it so much! Thanks again!
Pam from Over the Big Moon
It’s so easy! And I seriously love it as much today as I did the day this post went live! Thanks gain for the sweet compliment!
Pam from Over the Big Moon
It’s so easy! And I seriously love it as much today as I did the day this post went live! Thanks gain for the sweet compliment!
Katelyn
Thanks! Just bought a house and want to try to somewhat replicate this because I love it so much! Thanks again!
Amberly-A Prioritized Marriage
This is so perfect!!! Thanks for sharing! I’m going to be doing this in our bedroom 🙂
Amberly-A Prioritized Marriage
This is so perfect!!! Thanks for sharing! I’m going to be doing this in our bedroom 🙂
Pam from Over the Big Moon
YEY! Thanks Amberley – I hope you love it as much as I do!!
Pam from Over the Big Moon
YEY! Thanks Amberley – I hope you love it as much as I do!!