Today all your Cricut EasyPress 2 Questions are ANSWERED! I am answering all the FAQ’s that my readers are asking about the EasyPress 2!
This is a sponsored conversation written by me on behalf of Cricut. The opinions and text are all mine.

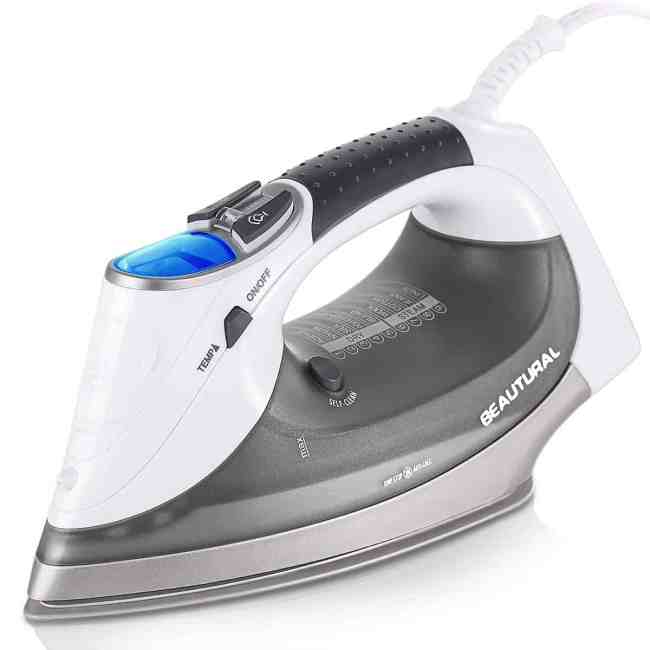
Hey friends! If you’ve followed me for a while, then you know that I’m obsessed with my Cricut and especially creating projects using Iron and my EasyPress 2! The Cricut EasyPress 2 gives you professional iron-on results in 60 seconds or less. The Cricut EasyPress is lightweight, portable, easy to store, and compatible with major brands of heat-transfer vinyl material.
I’ve written a lot on the topic, but I was still receiving emails asking a few questions, so today I am going to answer all of them! After reviewing the below questions, make sure you pop over and check out my posts Everything You Need to Know about the EasyPress 2 and Tips for Using Iron on Vinyl! Between these 3 posts, you should be more than ready to start creating ALL THE THINGS with Iron On!

What is the difference between the EasyPress 2 and Standard Irons or a Heat Press?
This is the #1 question I get from people that are just starting creating with Iron On. There are a lot of different options and it can be overwhelming trying to decide where to invest your money. The reality is they all get the job done, but at all different price points. So, let me run through them all with you to help you make your decision!
Household Standard Iron:
When I first starting using Iron On, I started by using my household Iron.
Pros:
- Most economical choice, because you probably already own one.
- They’re lightweight.
- Easy to store.
- Easy to maneuver around different materials that may not be perfectly flat.
Cons:
- The temperature on the iron heat plate is inconsistent, which requires you to move the iron around to try and even the heat displacement out.
- Requires a lot of pressure.
- You can’t adjust the heat, so it’s a guessing game as to how long you need to apply heat. After you apply heat for a while, you have to check it and then come back and check it again.
- More time consuming.
- Not ideal when making multiple projects at once. The heat plate doesn’t stay hot enough.
EasyPress 2:
I started by using the original EasyPress for about 18 months and I then upgraded to the EasyPress 2 collection! Now, because of the 3 different size options, I’m hooked! All my Iron On dreams can come true!

Pros:
- Available in 3 different sizes: 6″x7″, 9″x9″ and 10″x12″.
- All sizes are easy to handle and store. Even the 10×12 EasyPress 2 can easily store on a closet shelf or craft closet.
- The heat plate on all of the EasyPress 2’s hold consistent heat. Meaning that the heat is distributed evenly all over your design, with zero movement.
- It heats up super quick – just 2 minutes to get to 305 degrees.
- It’s super simple to use! Just set the temperature and how long your press time is and you’re good to go!
- All three EasyPress 2’s come with a base to set the EasyPress 2’s in. So, all the hot areas are in a base that is protects little fingers from getting burned!
- Has a USB port that will allow for future firmware updates.
- Remembers your last-used settings.

Cons:
- You do need to apply some pressure, unlike the HeatPress.
- It can get pricey if you want all 3 of the sizes. For this reason, I suggest starting with the size you think you’ll use the most!
Heat Press:
I had access to a friends Heat Press that she had. I went over and used it a handful of times when I was making batches of jerseys or shirts. She had this Fancierstudio Power Heat Press from Amazon.

Pros:
- Faster pressing time.
- If creating batches of a project, the heat press can really speed up the process.
- It can heat up to a higher heat.
- Has attachments that can make apply Iron On to harder materials easier – like hats, mugs, etc.
Cons:
- The size. For me the number one thing that bothered me was it’s size. It’s huge and weights a ton. So, you’d have to have a really good space to keep it. I also would be a lot more concerned having it out where kids can access it or touch it.
- Harder to learn. Even with my friend having the knowledge on how to use it, I felt like it was something that I had to have a lesson on. After my first few uses, it wasn’t that hard. But, it was a bit scary at first. If I wouldn’t have had my friend, I’m sure I would have been watching videos and reading the manual for a few hours prior to my first attempt at using it.
- It takes time to heat up. Her Heat Press took approx 12-15 minutes to get to heat.
- Limits you to a 14.5″x14.5″ application area.

I hope that breakdown of the home iron, EasyPress 2 collection and Heat Press helps you make a decision on what would work best for you!
Which size of EasyPress 2 should I get?

If you’ve decided to go with the EasyPress 2, but you’r not sure what size to get. Consider the below information when making your decision.
6″x7″ EasyPress 2 ($139)

Perfect for small projects like socks, onesies and baby clothes, toddler shirts, pocket designs, hand towels, buntings, etc.
9″x9″ EasyPress 2 ($189)

If you plan on using the EasyPress 2 for a variety of Iron On projects, then I’d go with the 9″x9″. It’s universal and a great size. It’s perfect for t-shirts, totes, pillowcases, aprons and more!
12″x10″ EasyPress 2 ($249)

The 12″x10″ EasyPress 2 is perfect for large projects! I generally use mine when making hoodies, large shirts, blankets, banners, etc!
What heat settings should I use for the EasyPress 2?

The number one issue I had when using my home iron is that I never knew how long to press the Iron On. Thankfully, Cricut has this amazing EasyPress Interactive Quick Reference Guide to take the guess work out of it!
Just go the the EasyPress Heat Settings website and start by choosing the type of Iron On you’ll be using!

Then choose the type of material that you’ll be applying the Iron On too!

Then select if you’ll be using the EasyPress Mat or a towel. Then it will load the exact heat temperature it recommends and how long you should apply heat to your Iron On. It also tells you if you should warm peel or cold peel!

Amazing, right?
Is there an Iron On material for sportswear?
Oh you know there is! And it’s one of my types of Iron On — it’s the SportFlex Iron On! You guys it’s AH-MAZING! It’s thin and lightweight and has crazy good stretch, which makes it perfect for activewear. So, materials like polyester and nylon! I almost always buy my boys DriFit shirts (WalMart has great options and prices too) and always use the SportFlex Iron On! You can check out these fun Basketball T’s I made them last year!

What is the best Iron On for shirts?
That really depends on what type of shirt you will be applying the Iron On onto! I suggest
The # 1 type of Iron On I use is their EveryDay Iron On! But, you can use their SportFlex Iron On on activewear, Holographic Sparkle Iron On, Glitter Iron On, Foil Iron On and Patterned Iron On!
I suggest going and reading this post, Tips for Using Iron On, that I wrote and it breaks down every type of Iron On and the materials I use that type of Iron On on. I also talk about the rules for layering each type of Iron On.!


What is the best Iron On for jerseys?
This totally depends on the material used for jerseys. If it is a material with any type of stretch, I suggest using SportFlex Iron On. If it doesn’t have stretch, then I would use Everyday Iron On. But, again, please check the material type and then you can even use the EasyPress Interactive Settings Guide as a reference to make sure
What is the Iron On Protective Sheet for?
The Iron On Protective Sheet is a liner to go between the EasyPress and the clear liner on your Iron On.
How to use the Cricut Iron On Protective Sheet:
1. Cut and weed your iron-on design.
2. Preheat fabric and place design on it liner side up.
3. Place Iron-On Protective Sheet on iron-on liner and apply heat with iron or heat press.
The Iron On Protective Sheet is not required for applying Iron On.
What is the EasyPress Mat for?

The EasyPress Mat was designed to help you have success with all your Iron On projects! The EasyPress Mat is designed to go under the material that you are ironing onto. It doesn’t allow the heat to escape the mat and into the surface that you are on top of. What does that mean? That all the heat from the EasyPress is being used to help the Iron On transfer to your material. It’s not escaping into the table or countertop that you are on top of. It also helps protect the surface that you are on top of from being damaged by the heat.
How does the EasyPress Mat do that? It’s made up of different layers that all have a purpose. Rather than trying to explain that to you, let me share Cricut’s explanation:
‘A magnificent mat of many layers! Protect your surface area and achieve flawless iron-on applications every time with this essential Cricut EasyPress™ companion. The durable cover provides thermal conductivity and even heat distribution. A special inner liner wicks moisture to deliver clean, dry heat. The foil membrane reflects heat to your project and prevents moisture vapor transfer, while the silicone foam provides insulation and shields your surface from damaging heat. Finally, the soft, protective bottom barrier seals layers together for flawless results. Mat is also perfect for pressing sewing projects and measures 12″ x 12.”‘

Does the EasyPress Mat come with the EasyPress 2?

The EasyPress Mat does not come with the purchase of the EasyPress 2. But, they can easily be purchased on the Cricut website!
I highly suggest you have one if you’re plan on doing a good amount of Iron On projects!
Can I use an ironing board with my EasyPress 2?
It is not recommended that you use an ironing board when using the EasyPress 2. You want a more stable surface. I suggest using a solid tabletop, like your counter, table, craft table, etc.
Which Cricut machines can cut Iron On?

All the Cricut Machines can cut Iron On! Woohoo!
What is the difference between Iron On and HTV?
There is not a different in Iron On and HTV (Heat Transfer Vinyl). It is merely the name that is different. Different companies call it different names.
I hope that answers all your EasyPress 2 questions! If I didn’t, make sure to check out my post on Everything You Need to Know about the EasyPress 2 and Tips for Using Iron on Vinyl! And if I didn’t, then feel free to leave a comment below with your question and I’ll answer it as soon as possible!
Make sure and check out a few of my Iron On projects below:
- DIY Girls Rockstar Costumes
- Teenage Boys T-Shirt Designs
- Netflix Teacher Gift Basket
- Birthday Girl T-Shirt
- Living My Best Life T-Shirt
- DIY Kids Basketball Shirts
- DIY Personalized Easter Bags
- St.Patrick’s Day Baby Outfit
- Sewing Bins
- 4th of July ‘Candy Target’ shirt and Candy Bag
Also, don’t forget to pin this post for later!

Leave a Reply