St. Patrick’s Day is a super easy holiday to make extra fun! Today I’m sharing three fun St. Patrick’s Day Gifts for Kids that are all made with my Cricut Maker that will all make their day special!
This is a sponsored conversation written by me on behalf of Cricut. The opinions and text are all mine.
I actually really love St. Patrick’s Day! Why? Because it’s one of easier holidays to celebrate! I generally have a small gift for my kids when they come down in the morning – even if it’s just simple like one of these 3 ideas I’m sharing below!
I also like to have a green breakfast and we’ll usually make a fun treat after school. But, each year it varies, depending on how busy we are. Make sure and check out these 25+ Easy St. Patrick’s Day Traditions to find a few fun traditions for you guys to celebrate!
KIDS ST.PATRICK’S SHIRT
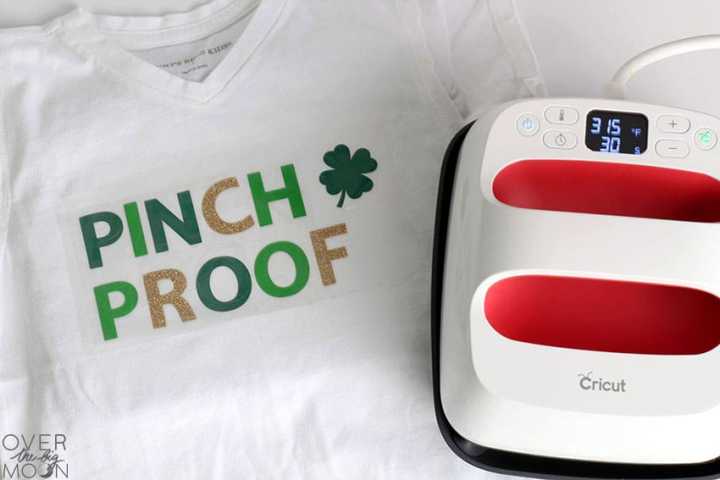
Making custom shirts is SO easy! Below I’m sharing this fun design!
This design is super fun, because I incorporate 3 different colors of Iron On Vinyl. I think it really takes the design to a fun new level!
If you’re new to making shirts or using Iron On, make sure and read these posts:
- Tips for Using Iron On Vinyl
- Everything You Need to Know about the EasyPress 2
- Your EasyPress 2 Questions Answered
PINCH PROOF TSHIRT
Items Needed:
- T-Shirt (Dylan’s wearing this one)
- Everyday Iron On – I used Apple Green and Kelly Green
- Glitter Iron On – Gold
- Cricut Maker
- Standard Mat
- EasyPress 2 – I used the 6″x7″
- EasyPress Mat – I used the 8″x10″ Mat
- Essential Tool Kit
- Pinch Proof Design Space File
Open the Pinch Proof Design Space File and hit customize!
Resize the design to fit the shirt you’re going to apply it to.
Once all your changes have been made, hit ‘MAKE IT’ in the top right hand corner.
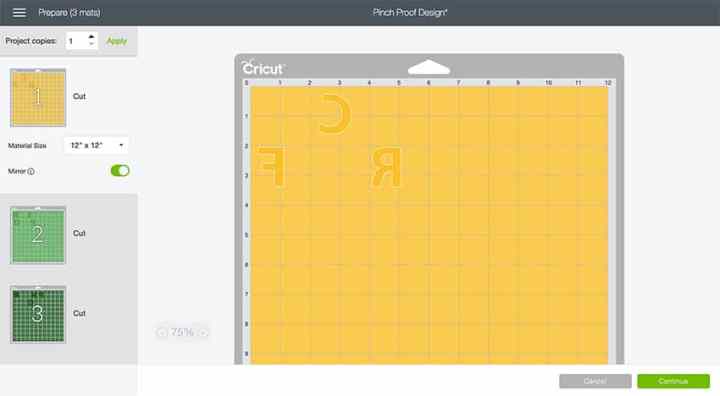
You’ll then get to the mat preview screen. Verify all the letters distributed to the proper mats, in the proper positions.
You’ll also want to make sure each mat is mirrored. Whenever you’re cutting Iron On, you’ll always want to mirror the images.
Then hit ‘Continue’ in the bottom right hand corner.
Choose your machine from the drop down menu and select your material. You’ll want to select Glitter Iron On when cutting the Gold Glitter Iron On and you’ll want to select Everyday Iron On when cutting the two green mats.
After all three mats are cut, then go ahead and weed the designs.
Use the Cricut Interactive EasyPress Heat Settings guide to verify the heat temperatures for the types of Iron On you’re using.
When applying multiple types of Iron On, you’ll want to apply the layer with the HIGHEST heat first. Even though you’re not technically layering the Iron On’s, you’re still going to be applying additional heat over the first layers of Iron On.
To figure out the placement on the shirt, I put the 3 layers together and then placed it on the shirt. Then I remove the top two layers, leaving the bottom layer in place.
For this design, I applied the Glitter Iron On layer first at 330 degrees for 30 seconds with my EasyPress 2.
I then removed the plastic layer and added the 2nd layer.
Lower the temperature of your EasyPress 2 to 315 degrees. Apply heat for 30 seconds.
Repeat for the last layer.
And that’s it! Pretty fun, huh?!?
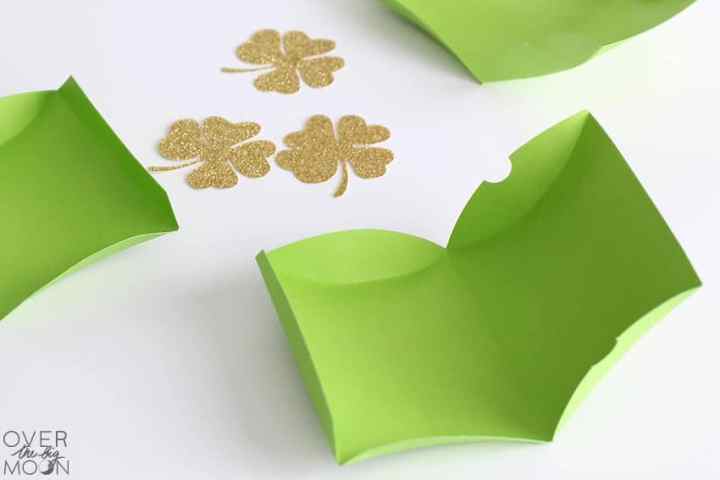
The next thing I created for my kids for this upcoming St. Patrick’s Day are these cute little Pillowboxes! I plan on adding some candy and maybe a $2 bill in them!
ST.PATRICK’S DAY PILLOWBOX
ST.PATRICK’S DAY GIFT CARD HOLDER
Items Needed:
- Cricut Maker
- LightGrip Mat
- Scoring Wheel
- Green Cardstock
- Gold Glitter Cardstock
- Hot Glue Gun & Glue Sticks
- St. Patrick’s Pillow Box Design Space File
Directions:
Open the St. Patrick’s Pillow Box Design Space File.
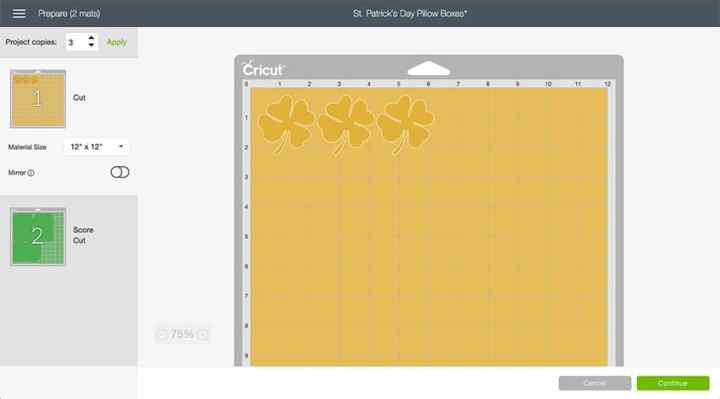
Hit the ‘MAKE IT’ button in the top right hand corner.
Then, change the ‘PROJECT COPIES’ to however many Pillow Boxes you want to make. I have 3 kiddos, hence me making 3 Pillow Boxes.
Then hit ‘CONTINUE’ in the bottom right hand corner.
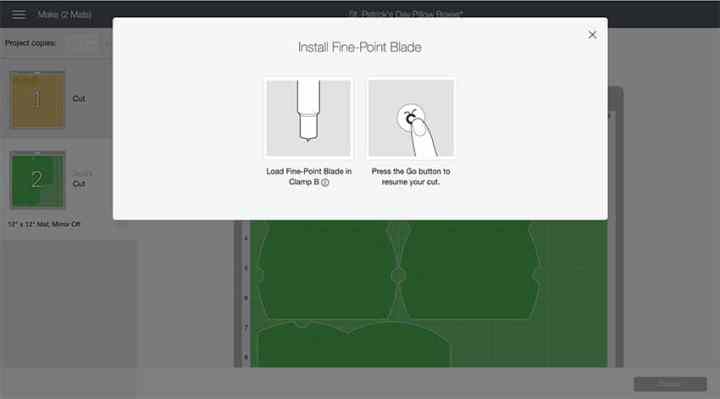
For this project you’ll need to load your Scoring Wheel first, because your Cricut Maker scores the cardstock prior to cutting it.
After it scores the cardstock, Design Space will prompt you to load the Fine-Point Blade. It’ll then cut the Pillow Boxes out.
Next, it’s time to assemble! I first like to fold all the score lines on the pillowboxes.
I used hot glue to assemble my Pillow Boxes.
And that’s it! Fill them with whatever you want! This would even be a fun way to gift a little something to your child’s teacher!
ST.PATRICK’S DAY FAMILY GIFT
I also wanted to put together a little treat to have out on St. Patrick’s Day! So, I decided a fun Pot o’ Gold Centerpiece for our kitchen island would be fun!
This project was so easy guys! And I think it turned out pretty dang cute!
Pot o’ Gold Centerpiece
Items Needed:
- Cricut Maker
- Fabric Mat
- Green Felt – I used the Green out of this Sampler
- Mustard Yellow Felt – I used the yellow out of this Sampler
- Black Glitter Cardstock
- Yellow Cardstock
- Paper Straw or Lollipop Stick
- Hot Glue Gun & Glue Sticks
- Plastic Flower Pot
- Rolo Candies
- Gold Coins
- Pot o” Gold PinWheel Design Space File
Start by opening the Pot o” Gold PinWheel Design Space File!
At this time you can resize the pinwheels if needed for your centerpiece. Once you’re done amending the Design Space File, then go ahead and hit ‘MAKE IT’ in the top right hand corner.
The design should split to onto 4 mats – black glitter cardstock, yellow felt, yellow cardstock and green felt. Your mats may load in a different order.
Then hit ‘CONTINUE’.
Choose your machine from the drop down menu and select the material for your first mat.
Remember to change the material for each mat that you load. On the Felt mats, you’ll also need to switch out your Fine-Point blade for the Rotary Blade.
Then use your hot glue gun to assemble the pinwheels.
Attach the Felt PinWheels a white lollipop stick.
On the outside of the pot, you’ll attach the Leprechaun Belt! I used hot glue to attach the belt to the flower pot.
I filled my Pot o’ Gold with Rolo Candies and Gold Coins! Then put the pinwheels down into the Pot o’ Gold! And you’re done!
I am so excited for St. Patrick’s Day to roll around! All that I have left is to make my boys some shirts!
Follow me on INSTAGRAM, PINTEREST, TWITTER and FACEBOOK for recipes, DIY’s and more!
Don’t forget to pin these fun St.Patrick’s Day Gift Ideas!










Sabrina
These are all so adorable! Love the gold mixed with the green on the pinch proof shirt.
Steph
Such great ideas, they are so cute!
Rachael Yerkes
So stinking cute and fun! I am definitely doing this!
Billy
What clever ideas, my daughter would love those shirts! Awesome job!
Alli
These are super cute ideas. Absolutely trying them out this year.
Valentina
Such cute ideas for St. Patrick’s Day with crafts for my kids. I am definitely pinning for later. Thanks for sharing.