Are you wondering the differences between the Cricut Heat Press products and if a Cricut Heat Press is Worth It? Come learn all that info, while personalizing a Cricut Storage Tools Organizer!

In my years and years of crafting with Cricut products, the number one question I have been asked from friends and family is if the Cricut Heat Press is worth it! And I always answer, YES! The more Heat Press products that Cricut releases, the more I fall more in love!
Today, I am going to share a fun project I made with my EasyPress Mini and then quickly run through the different Heat Press products that Cricut has and what the difference is between them!

Everything to know about the Cricut Heat Press Machine
There are two Heat Press’s that are my go to — my EasyPress Mini and 9×9 EasyPress 2. The EasyPress Mini is just so small and universal! I love to label and customize small storage containers and items for my kids, so I use it often!
If you are someone that loves to organize and personalize: small storage items and pouches — hats — socks — onesies — sleeves of shirts and sweatshirts — earrings — shoes — pockets of pants and shorts then you will love your EasyPress Mini! It’s basically a pocket-sized heat press!!

Why the Cricut Heat Press is better than an Iron
The easy answer is, YES! Any and all Cricut Heat Press items are better than an Iron! Let me tell you why! The first main reason is that heat surface on Cricut Heat Press products are better. Unlike an Iron, every Cricut Heat Press contains an even heating plate vs varying heats among the heat plate. This is a huge benefit, because all your Iron On will transfer evenly.

When working with an iron you have to move the iron around constantly, trying to make sure the whole surface gets somewhat evenly heated and that the Iron On or HTV transfers properly. If Iron On or HTV gets overheated, then it can start to melt and wrinkle, causing it to lift much quicker with uses or washes. So, having an even heat plate is HUGE and very beneficial!
Also, all Cricut Heat Press products allow you to set a temperature and a time (minus the EasyPress mini which doesn’t have a time feature)! Cricut has also researched and tested all their products with different transfer surfaces, heated temps and heat times to create a very helpful Heat Guide that you can reference to learn the heat temperature and transfer time for your projects based on the product you’re using and the base material you’re transferring the Iron On to!!

You can view the Cricut Heat Guide HERE! If you own any Cricut products, you’ll want to bookmark that page!
Now that I’ve covered why I love Cricut Heat Presses, let’s cover the different presses and the reasons you would want/need each of them!
The difference between the various Cricut Heat Presses

EasyPress 3 Sizes and Features
The EasyPress 3 comes in two sizes: 9″x9″ and 10″x12″! The heat plate reaches temperatures up to 400ºF and the EasyPress 3 has a timer that helps you follow the suggested transfer times for your projects. You can use this product using iron-on (HTV), Infusible Ink & sublimation products. Unlike the EasyPress 2 this EasyPress 3 features bluetooth connection of the Cricut Heat app. Simply send ideal time and temperature settings through Bluetooth® connection via the Cricut Heat app.
EasyPress 2 Sizes and Features
The EasyPress 2 comes in two sizes: 9″x9″ and 10″x12″ and contains all the same features as the EasyPress 3, except it doesn’t have have the bluetooth connection to the Cricut Heat app.

EasyPress Mini Sizes and Features
The EasyPress Mini is Cricut’s pocket sized EasyPress that is perfect for all small projects! I talked more about it above!
Cricut Hat Press Features
The Cricut Hat Press allows you to easily customize hats using iron-on, Infusible Ink & sublimation products!! It’s perfectly sized and has a curved heat surface to ensure that your design transfers flawlessly! The heat plate features 3 levels of heat up to 400ºF. Using the Cricut Heat app, you can set the time & temp with your phone via Bluetooth®.

Cricut Mug Press Features
The Cricut Mug Press allows you to make customized mugs using Infusible Ink and sublimation products! It has a heat plate with zone heating, which creates excellent, consistent results all the way around the mug. There’s no temperature settings, just attach your design around the mug, put it in the Mug Press and press start! You’ll be making gifts for all your friends and family!
Cricut Autopress Features
The Cricut Autopress is the most professional heat press made for home use! The machine itself is super sleek, lightweight and easy to use. You can close the Autopress with just a couple fingers! Set the temperature and time with the control pad! The ceramic-coated heat plate can heat to 400°F and automatically adjusts to materials up to 2 in thick. The Cricut Autopress is the perfect machine for those that make a lot shirts or run a small business!

And there is a breakdown of all the Cricut Heat Presses!! They really have something for everyone – every crafter! Now let’s get crafting! Today, I’m going to customize a small organizer tote to hold my all my Cricut tools! I often times will take my Cricut Joy, EasyPress Mini and Tools to a friends to craft and so I wanted something better to carry my tools in!

How to Make a DIY Cricut Tools Organizer
Items Needed:
- Organizer Tote (pencil pouch, small bag, etc)
- Cricut Machine (I used my Cricut Joy)
- Smart Iron On
- EasyPress Mini
- Weeding Tools
- Weeding Tools
- Ruler
Directions:
Start by opening the Cricut Design Space file for the Cricut Tools Organizer!

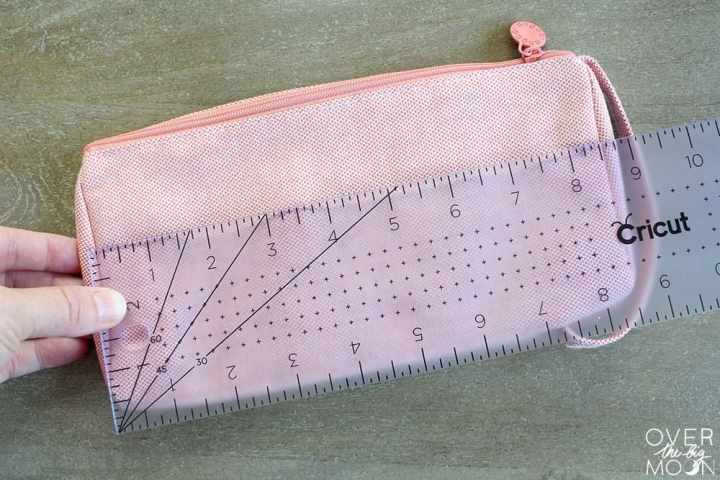
Start by measuring the area that your iron on label is going to go with your a ruler! Then go to Cricut Design Space and amend and/or resize the design to fit your need. I have one of the word phrases having a shadow. So, I have two different colors for those words. That way when it comes time to cut, it will split those layers onto two different cuts. If you are not wanting to create the shadow effect, then delete one of those layers.
Make sure that in the top right hand corner, the correct machine is selected from the drop down menu! I am using my Cricut Joy, so I have Joy selected!
Once everything is ready to go, hit ‘MAKE IT’ in the top right-hand corner. If you’re using a Cricut Joy, then it will have you select if you will be using a Smart material or a regular material, which requires a mat! Make the selection that applies to you and hit Continue.

It will then show a preview of your design as it will cut. Click to mirror your image(s) on each of the cutting layers! This step is imperative! When cutting any-type of Iron On, you will ALWAYS need to mirror your designs before cutting them!

Plug in your Cricut Joy machine and get your Smart Iron On ready in the color of your choice and hit continue in Cricut Design Space. Then select the type of product you are using.

When the light starts flashing on the top of your Cricut Joy, load your Smart Iron On into your machine, SHINY SIDE DOWN. Then go back to Cricut Design Space and hit ‘Go!’

After it’s done cutting, click unload in Cricut Design Space for it to release the iron on from the machine. Repeat those last few steps to cut the 2nd Smart Iron On color!
Using your weeding tool to weed the excess Smart Iron On from around your designs.

Next, when all the designs are weeded, you are ready to apply the design to the surface of your organizing pouch! I have worked with pouches and bags in the past and I once melted the liner on the inside. Make sure to look inside of your organizer and if you are worried a liner or pocket could melt, protect it by adding a dish cloth and/or paper towels!

Plug in your EasyPress Mini and get it heating. For this material, the Heat Guide told me to put it on Medium heat for 25 seconds.

Once it is heated, quickly run the EasyPress Mini over the area that you’re going to apply the design and then put your design in place. Once in place, move your EasyPress Mini over the design until the entire area has been heated approx 25 seconds. Then allow it to completely cool, prior to trying to remove the clear liner. If any part of the design is lifting, then apply 5-10 more seconds of heat on that area.

Repeat that same step for the top layer of and the words on the back of the pouch. Be sure to allow it completely cool and remove liners and you’re done! Woohoo!

Then fill it up with all your favorite Cricut crafting things and get your next crafting night planned!

Ready to get crafting? Here are a bunch of fun projects that use one of Cricut’s Heat Presses! Take a minute and click through them and hopefully you’ll feel inspired!
Project ideas for your Cricut Press Machine
Looking for some fun projects that use one type of Cricut Heat Press? Check these out!
- Disney Shirts and Hoodies – I put together this fun collection of Disney themed shirt and hoodie ideas for a girls trip! I’ve used them now a handful of trips and I love having them ready to go!
- Cheers and Beers Party – in this post I show how you can put Iron On on napkins! Such a fun way to add a simple touch to any themed party or get together!
- Soccer Mom Hoodies – this is a great beginner project! Uses one type of Iron On, with no layering!
- Custom Tote Bags – I used Infusible Ink to make these super fun reusable totes!
- DIY Funny Saying Socks – my son loved when I made him these socks!!
- Netflix and Grade Teacher Gift – I need to do this gift again this year! My sons teacher loved it when I did it for her a few years ago!
- Sewing Bins – If you’re wanting to try layering with the same type of Iron on, this project would be a great one for you!
- Birthday Girl Shirt – this is a great project if you’re wanting to try working with Glitter Iron On and work on layering!

More Favorites from Over the Big Moon
Follow me on INSTAGRAM, PINTEREST, TWITTER, and FACEBOOK for recipes, DIY’s, and more!

Leave a Reply